Introduction To Version Control and Git
Version control systems (VCSs), also known as source code management systems, are essential tools utilized by experts in many different fields, such as programmers, UI/UX designers, copywriters, and more. Its purpose is to make it easier to handle digital assets in an organized manner and to track changes and alterations made to a project or product with ease. The main purpose of the system is to monitor and document the various versions or stages of a project as it progresses over time. This is where the term version control’ comes from.
A new ‘version’ of any digital asset is formed whenever any kind of modification is made to it, be it a document, a piece of code, a design, or anything else. ‘Commit’ is a critical activity that is used to maintain an exhaustive record of these versions and the changes that go along with them, we will discuss more on this later on in this article. By taking a “snapshot” of the project at this point, it is possible to maintain it as a separate version. Together, these commits, or snapshots, create a historical timeline of the project that facilitates collaboration, quick review, tracking, and management of changes, and easy rolling back to previous versions as necessary. In essence, a version control system is a vital resource for preserving cooperation, traceability, and order throughout a project’s lifecycle.
Although there are a few other version control systems available, Git will be the primary topic of this article’s study.
KEYNOTE :
Instead of using a code clipboard, I prefer to utilize photos as my code examples because in order to learn how to code, it is preferable to endure the strain of bouncing between programming languages and tools. This is because learning to code requires active participation, copying and pasting commands from the clipboard won't cut it for a learner. To ensure that the commands become ingrained in your brain, you must type out each command on your own. I appreciate your patience and perseverance.
Benefits of Version Control
Version control systems have a wide range of benefits, and that’s what makes them indispensable in various fields, such as software development, content management, and several others. Below are a few benefits of version control.
History and Audit log: Don’t get scared; this simply means every change made to the project is recorded and can be reviewed. This benefit is useful for accountability, compliance, and understanding of the project’s evolution. To me, this is one of the foundational reasons why the version control system was made in the first place.
Collaborations: It helps facilitate collaboration among team members by providing a central space where team members can work on code or content. Multiple people can work on the same project without conflicts or issues.
Conflicts Resolution: When two or more members make changes to the same code or file in different branches and a merge is done, there is usually a conflict whereby the system is trying to figure out what the right changes to be kept and how they are to be preserved, so usually a decision has to be made to resolve this conflict. The VCS helps integrate this process consistently and seamlessly.
Backup and Disaster Recovery: VCS serves as a backup for your project; when there is a catastrophic event, the whole project can be recovered from the version control system repository.
Testing and Quality Assurance: VCS helps enable you to create testing and staging environments in a well-structured manner in a lovely setting before deploying to production. In cases where continuous integration and continuous delivery (CI/CD) are implemented, visit this page to learn more about CI/CD.
Flexibility: It can be used to manage digital assets other than code, such as configuration files, etc.
Change Tracking: It can also be used to track changes in the project, including who, when, and what was changed. This helps identify issues and track the project’s progress.
Security: The VCS platform offers authentication and access control to manage sensitive project information and ensure that only authorized personnel can make changes.
Version control systems have many advantages; these constitute only the tip of the iceberg. They offer a plethora of benefits that enhance project management, collaboration, and code quality, making them indispensable tools in a variety of fields.
Introduction to Git
History and Purpose of Git
Now some questions, like what is Git and who created it? Is it proprietary software, which refers to software that is privately owned and is distributed under specific licensing, or is there open source software (OSS), which refers to software that is managed by the public and is protected under specific licenses too? Their source code could be inspected, modified, and enhanced by anyone in the public space.
Well, it is a great pleasure to announce to you that Git is open-source software, and you too could modify its source code on your own, modify things you think could be done better, and enhance the usage for yourself and others.
Photo by Vanna Phon on Unsplash
Git is a type of VCS that manages versions of products, forming a project history. Each version of a project is called a commit. It also has all the benefits mentioned above and more. Git was created in 2005 by Linus Torvalds, the same person who developed the Linux operating system. Torvalds developed Git to provide a solution to some of the limitations he found with other version control systems like BitKeeper, which ran on Linux but became less accessible for the Linux project, so he decided to build his version control system. Git was developed with some key principles in mind, such as speed, distributed systems, and support for non-linear development because the Linux community needed something that could manage a complex project with a large number of contributors. It was released as open-source software under the GNU General Public License (GPL). Like I said previously, it has all the above benefits and more.
Git’s primary purpose is version control, which means allowing development or content and its changes to be tracked. Each change is recorded as a snapshot called a commit, curating a historical record of modification. It is designed for distributed development; it is a distributed system, which means people can work on several parts of a project and put the final results together without unnecessary headaches. It can also handle small and large projects, which makes it scalable and suitable for projects of all sizes. While it is commonly associated with source code, it can be used to manage several other digital assets.
In conclusion, Git was created to address specific needs in the development of the Linux kernel but has since become an essential tool in software development, offering a distributed, efficient, and flexible approach to version control worldwide.
Key concepts (Repositories, commits, branches) in Git
Repositories (Repos): It is a directory, or we could say a store, that contains the folders, files, and version history of a project. It is like a database that stores all the changes made to the project over time. We have two main repos: a local repository and a remote repository. The local repository is the repository on your machine where you work; it contains some of the version history if it’s a collaborative project and allows you to make changes and commits (snapshots). While a remote repository is a repository hosted by a Git hosting provider like GitHub, Bitbucket, or GitLab, now you see that GitHub and the others are not version control systems themselves; they are hosting providers for Git. A remote repository acts as a central hub for collaboration and backup. Developers can push and pull changes from there.
Commits: Like the cell is the fundamental unit of life in the body, a commit is the fundamental unit of change in Git. It represents a specific snapshot of the projects at a given point in time. Each commit contains metadata, which means the identity features of that commit, like the author’s name, email, timestamp, and a unique (Security Hashed Algorithm-1) SHA-1 value. When committing, it is advised to add a descriptive message to provide context for why the change was made.
Branches: A branch is an independent part of a repository that can exist alone without causing harm to the main repository; it is an independent part of development that allows developers to work on new features, fix bugs, and experiment independently without affecting the main codebase. You can create and switch branches to work on specific features and bugs, allowing you to focus on that particular aspect of the project you are trying to develop. When you are done, you can merge your work to the main repository easily and seamlessly to the base branch. Don’t worry, most of these terms will start to make sense when you start righting the commands for git.
Git Workflow
In Git, the typical workflow involves three primary areas:
1. Working Directory (or Working Tree): This is where you will add, edit, and remove files related to your project. It displays your project’s current state as it is on your local computer. It serves as your project’s “workspace,” where you alter your files.
2. Staging Area (Index): The staging area serves as a middle stage between the Git repository and your working directory. You use the staging area to pick and choose which modifications from your working directory get into the upcoming commit. You can stage particular files or modifications for the commit by using the “git add” command. By doing this, you can make sure that the modifications you desire are included in your commits.
3. Git Repository (History): The history of your project is permanently stored by Git in the repository, also commonly referred to as the repo or repository. Together with metadata like timestamps, author information, and the actual changes made to the project over time, it includes all of the commits, branches, and tags. The repository’s commits are snapshots of your project taken at various intervals.
Making changes in the working directory, staging the changes you wish to commit in the staging area, and finally generating a commit to store those changes in the Git repository are the standard steps in the Git workflow. This three-area model offers an organized method for keeping track of modifications, working with others, and keeping an extensive project history.
Getting Started with Git for Beginners
There are several ways we can work with Git: either through a terminal or command line or through a graphical interface called a git client. This is where the command line comes in handy! Don’t worry, friend — this isn’t coding at all, and I’ll do all in my power to make sure you have fun! Let’s get going.
Installing Git
Installing Git, a widely used version control system is a straightforward process. The steps may vary slightly depending on your operating system. Here’s a detailed guide on how to install Git on various platforms:
Installing Git on Windows:
- Git Bash for Windows (Recommended):
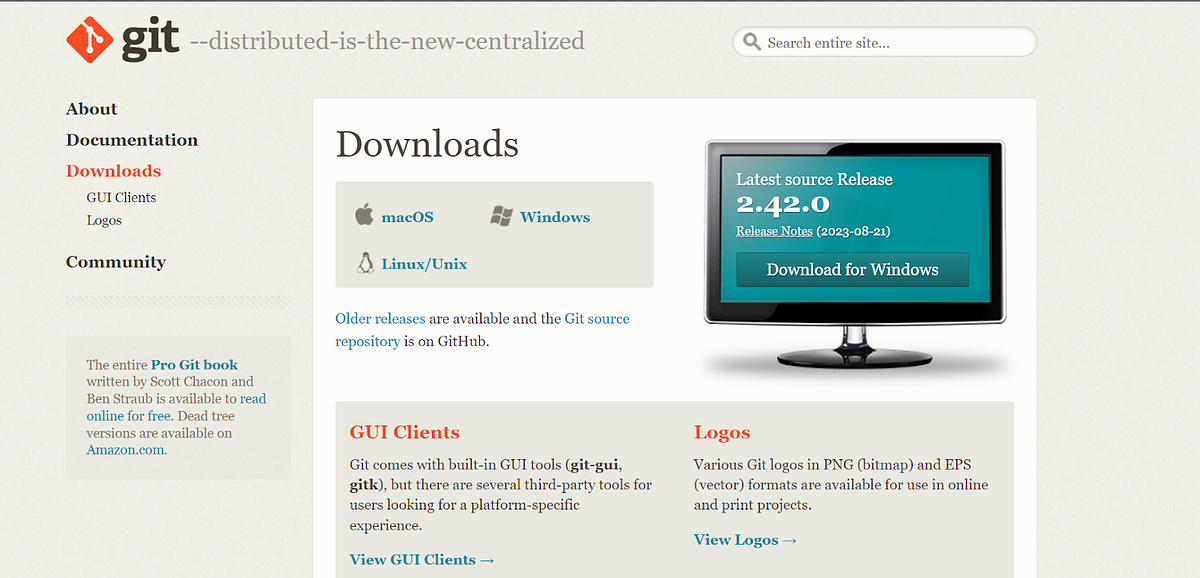
- Go to the official Git for Windows website: Git
- Download the installer and run it ( based on the specifics of your operating system whether Windows, Linux, or macOS.
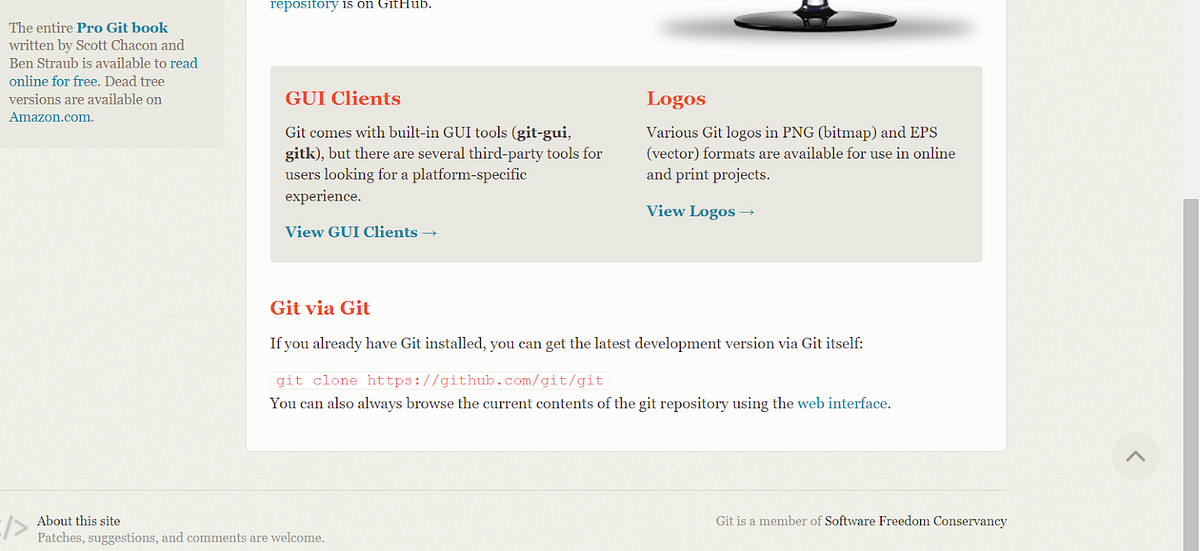
If you already have git installed you could use:
git clone https: //github.com/git/git
- Follow the installation wizard, making sure to select the default options
- Choose a text editor (e.g., Visual Studio Code) to use with Git.
I guess you are familiar with Visual Studio code already, open your terminal and start playing with the commands below as you keep reading.
- Opt for the “Use Git from Git Bash only” option for a more native command-line experience.
b. Git for Windows (Git GUI):
- Alternatively, you can download and install the Git for Windows with a user interface from the same website mentioned above.
- Follow the installation wizard and select the default options.
- This option provides both the command-line and graphical Git tools.
Installing Git on macOS:
a. Homebrew (Recommended):
- If you have Homebrew installed, open your terminal and run the following command to install Git:
brew install git
b. Xcode Command Line Tools:
- On macOS, you can install Git via the Xcode Command Line Tools. If you haven’t already, a dialog may prompt you to install these tools when you attempt to use Git for the first time.
Installing Git on Linux:
a. Debian/Ubuntu:
- Open a terminal and run the following command to install Git:
sudo apt update sudo apt install git
b. Red Hat/Fedora/CentOS:
- Use the following command to install Git:
sudo dnf install git
c. Other Linux Distributions:
- Refer to your distribution’s package manager to install Git. The package name might vary (e.g., git, git-core).
Configuring Git
For the sake of this course, we will be solely working with Windows OS but you could do this in a MacOS also:
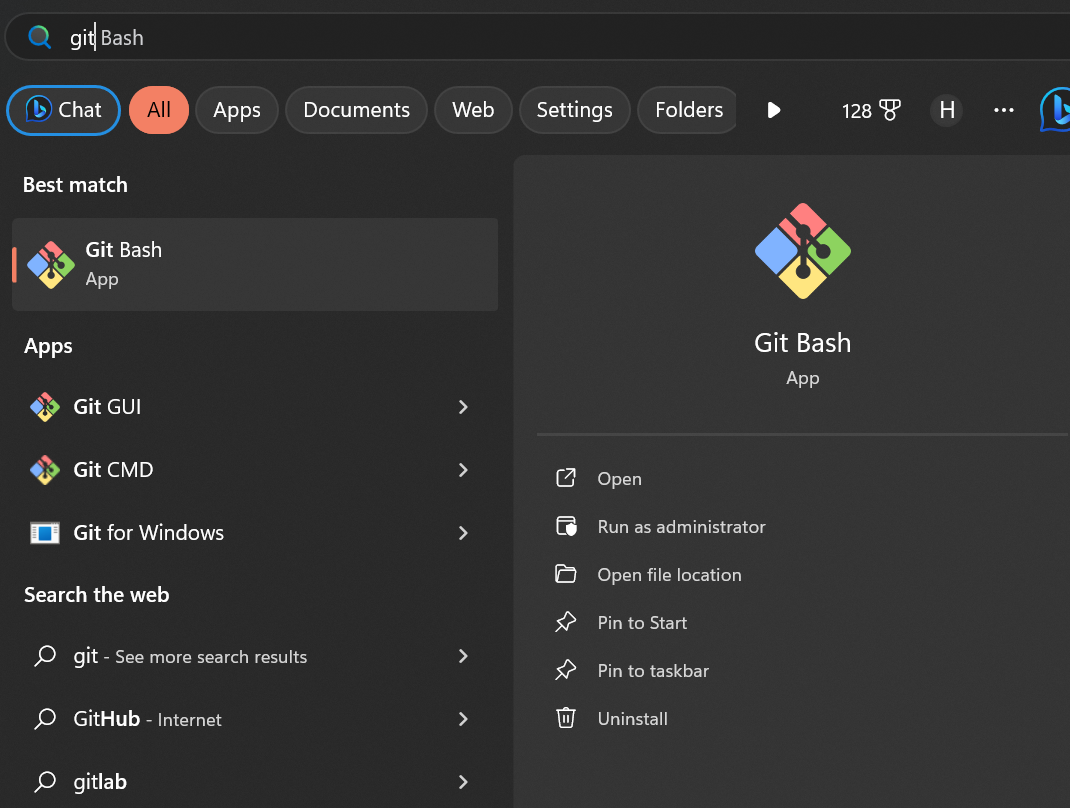
1. Search the name “git bash” on your start button search bar
2. Click on the “Git Bash” application, you should see an interface like the one below.
3. Write the command you see in the picture below in the git bash terminal, then fill in your details where necessary my real name is “Alpheus”. You can connect with me on Twitter Alpheus my email will be abcd@gmail.com. Ensure to use yours during your configuration because it will be associated with a lot of your work.
Creating Your First Repository
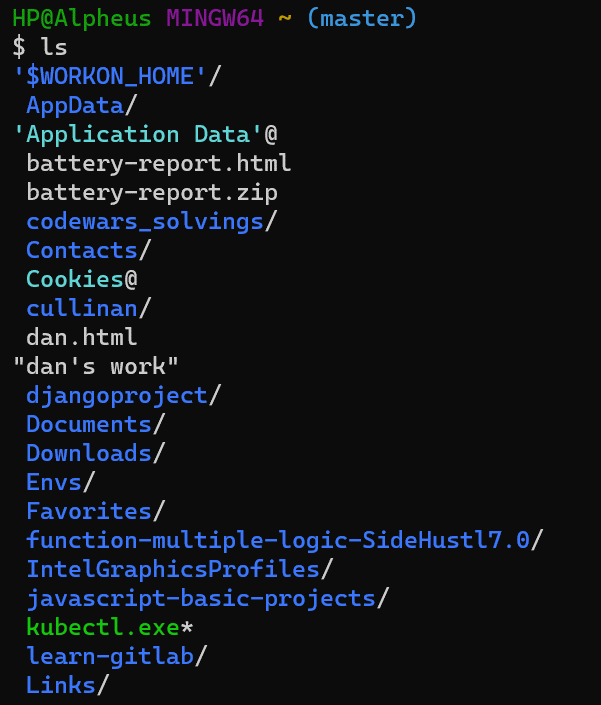
You should see a list of all the directories and files in your working directory.
1. Make a directory using the command in the picture below, the name “EmbraceGitTest” could be any name of your choice.
2. Change the directory into the folder you just created, ensure to use your tab, to auto-fill the name of the directory you will be creating when typing in the terminal.
3. Initialize the directory with git, you should see a message like “Initialized empty Git…”
Basic Git Commands
1. Create files so we can test and work with its very powerful but basic commands, use the “touch” command to create files of your choice, and name them anything you want.
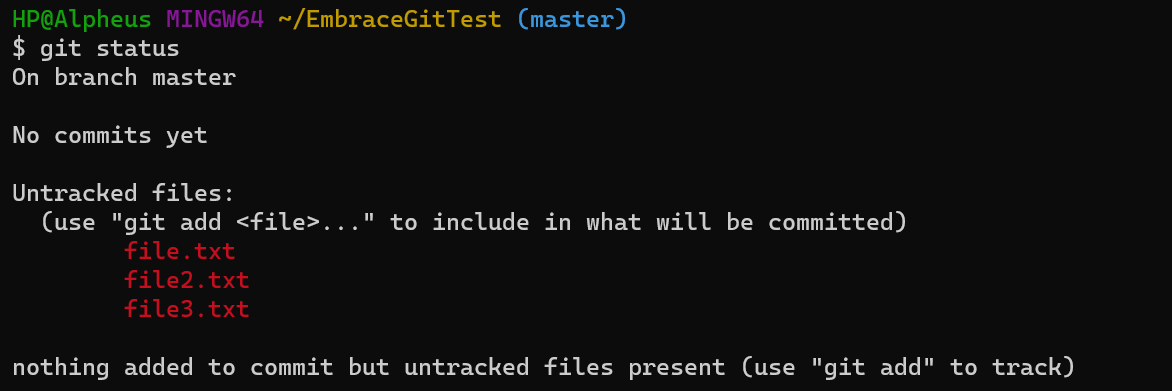
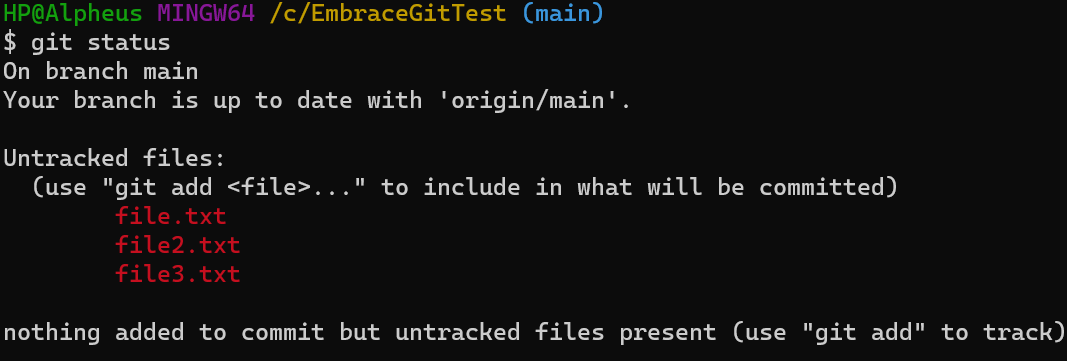
2. Use the “git status” command to check the status of the files you just created.
The Untracked files, highlighted in red show you have some changes you have to add to your staging area, so you could be able to get a commit (A snapshot of the changes at that instant in time) of the file, you may be wondering what is a staging area or a commit go back up and read the git workflow section.
3. The way you add files to the staging area in git is by using “git add.” You can either add the files or folders to the staging area independently or all at once.
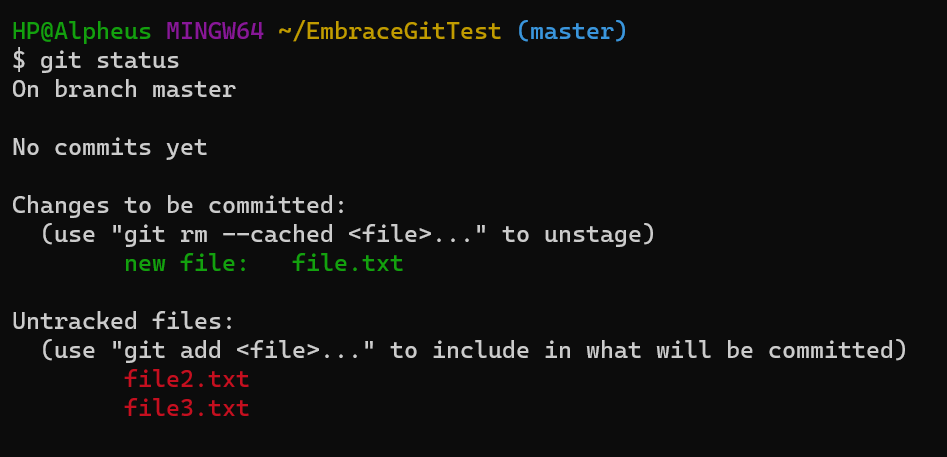
The picture shows how you add files independently.
The picture below shows the status of the files being modified and the untracked ones.
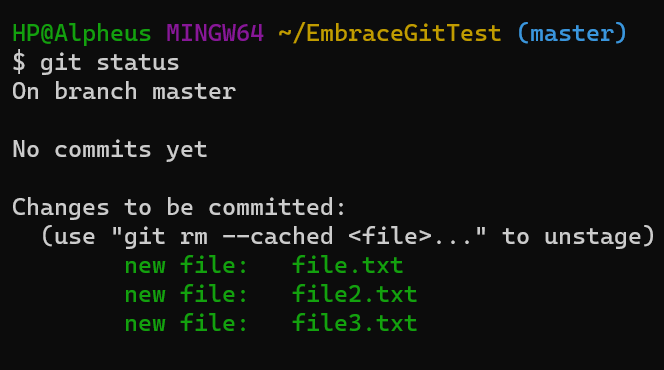
The picture below shows how you add files all at once. Please take note of the full stop punctuation sign.
The picture below shows the files when they have been modified all at once.
4. When you add files to the staging area as the middle man to take a snapshot of the total changes made to the files, please create a git commit. Below are the ways you could create a git commit.
The “-m” represents the message you want to keep on that particular commit.
5. To check the commits and resent changes and additions of a commit you could use the “git log” command.
To check the most recent commit using logs without showing the details.
Creating and Managing Branches
Now we have finished with the basic commands in Git, now let’s look at “Branching”. Recall that a branch is an independent version of a particular project, that can be worked on separately without the master branch knowing.
1. Branching: It is a means of working on new features on a particular version of a project, without disturbing the original (master) project. How to create a branch in git, could be done in two different ways which are the methods below.
Note when you create a branch or check a branch, what you just did was copy the working directory, so you could modify or add new features or even fix a bug.
If you want to create a branch but not switch to it which is termed checkout in git, use the command below.
The pictures below show how you could create a branch and switch to it immediately if you are using Git 2.23 and later.
2. If you want to list the branches created on this repository, use the picture below.
Take it that you make changes to the same file in two different branches, and you want the changes you made to the topic branch (a branch created from the master branch to solve glitches, bugs, build new features, etc.) to be merged i.e., added to the original master branch by the admin in charge of the project.
You will surely have a conflict (a conflict means a clash of disagreement between two things and a decision, by a person has to be made to tell git which and how that file is to be merged), not to talk much let’s get to the practical. I am going to try and explain the concepts of creating branches merging changes and resolving conflicts all at once so please pay attention to this section, it’s quite simple.
1. I will work on a file in the master branch and add the changes to the staging area and then checkout(switch) to another branch (topic or feature branch), work on that same file, commit the changes then merge the changes to the master file so we could get a conflict, and then resolve the conflict.
I will list the branch with the “git branch” command, you will know you are on a branch by seeing the branch highlighted in green, and an asterisk on the left of the branch label.
I will then checkout to another branch (master branch) using the “git checkout master” command.
List the branches again.
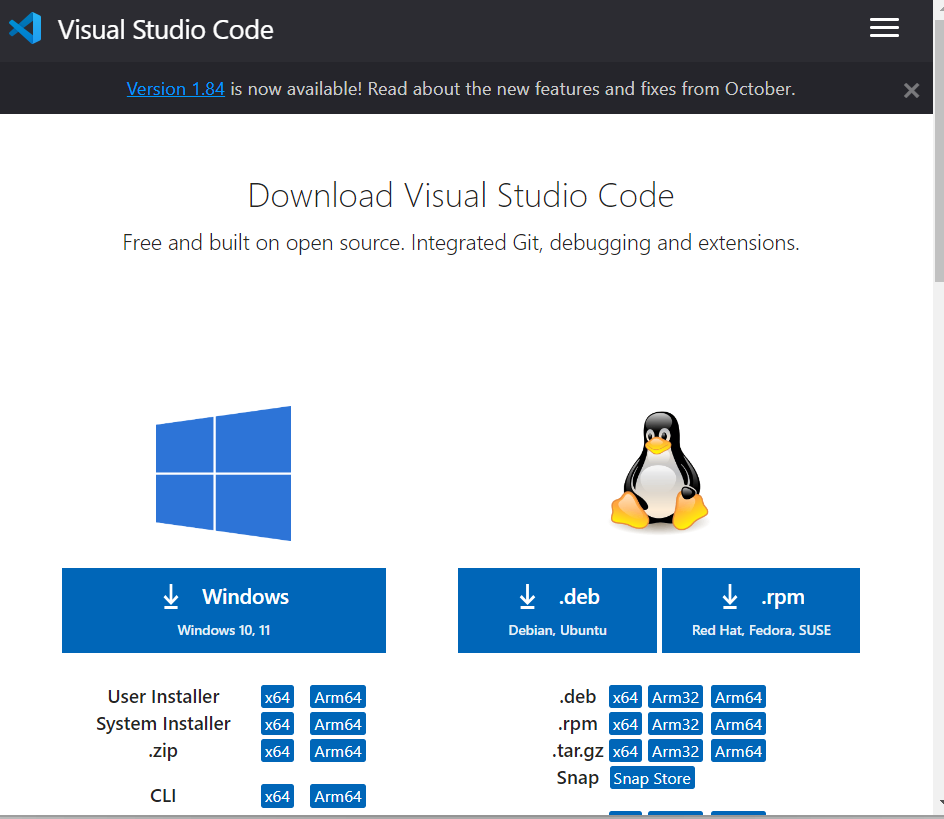
In the prerequisite section, I told you to have Visual Studio code text editor installed, if you don’t have that please download it here Git
List the files in the master branch on the git bash terminal.
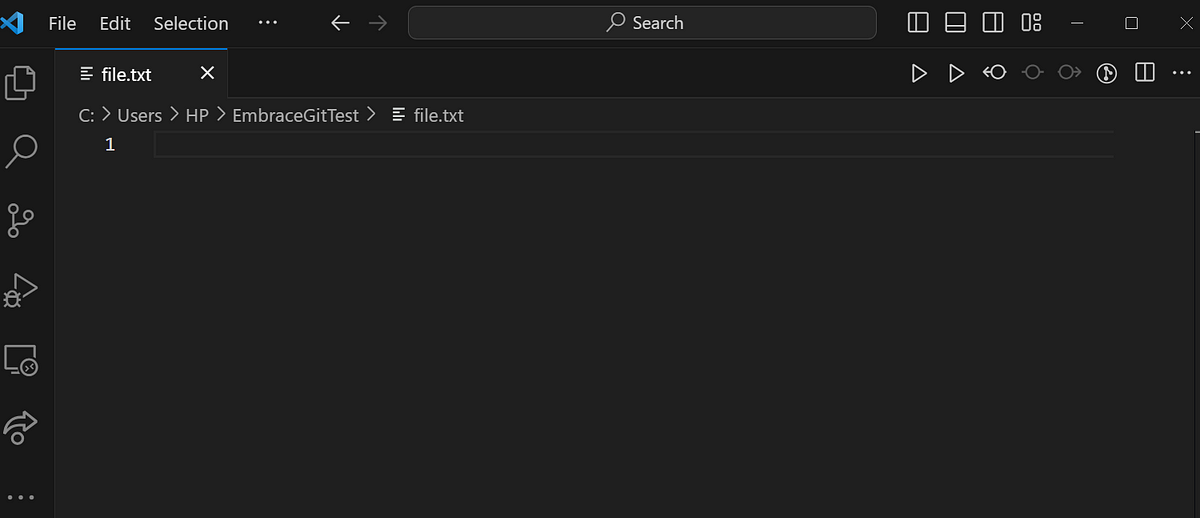
Open the “file.txt” using Visual Studio code.
When you open the file it will be empty at first.
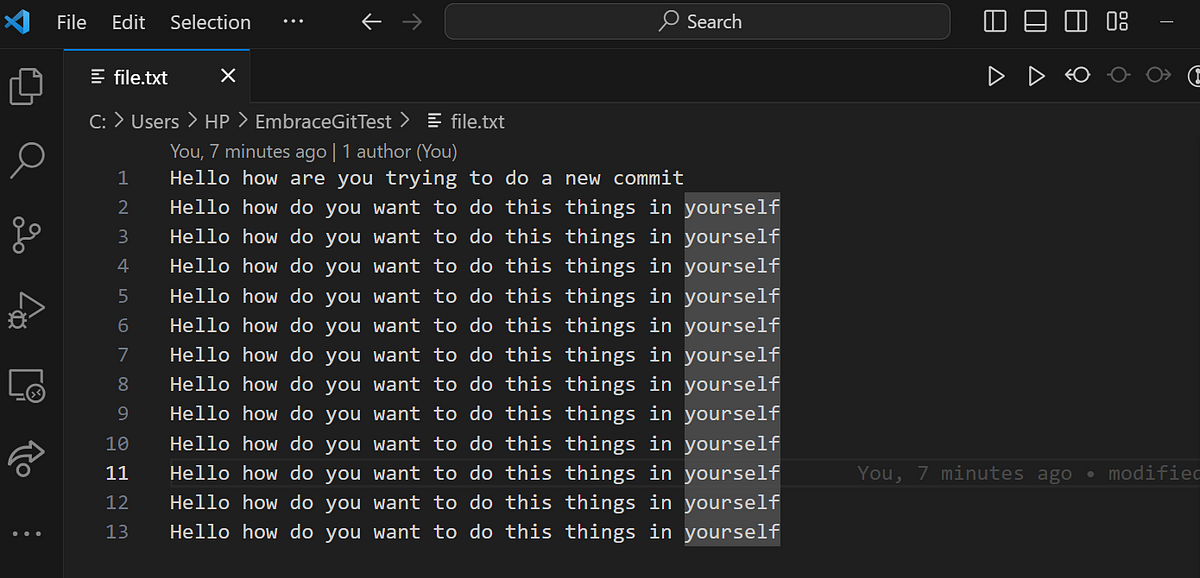
Add content to the file and “Ctrl + S ”, ensure to save the changes before closing the text editor.
Check the status of your project, you should see “file.txt” highlighted in red which means you have changes you need to stage and commit.
Add the changes to the staging area, pause for a minute do not look down, and see whether you can add a change to the staging area preparing it for the next commit.
Create a commit.
Check the status of your file using “git status”, I think you should know how to do that, and then switch to another branch so we can work on the same file in that, First, list the branches with the “git branch” git command. Then switch to any branch you created before.
Switch to any branch of your choice, I have chosen “feature”, so I will checkout into it.
List the branches, I believe you know how to do that, list the content of the branch using “ls”, and open the file you modified in the master branch using the Visual Studio code editor with its command “code file.txt”.
Open the file you modified in the master branch, do not open another file, if you do a merge conflict can never occur, because there is no decision to be made.
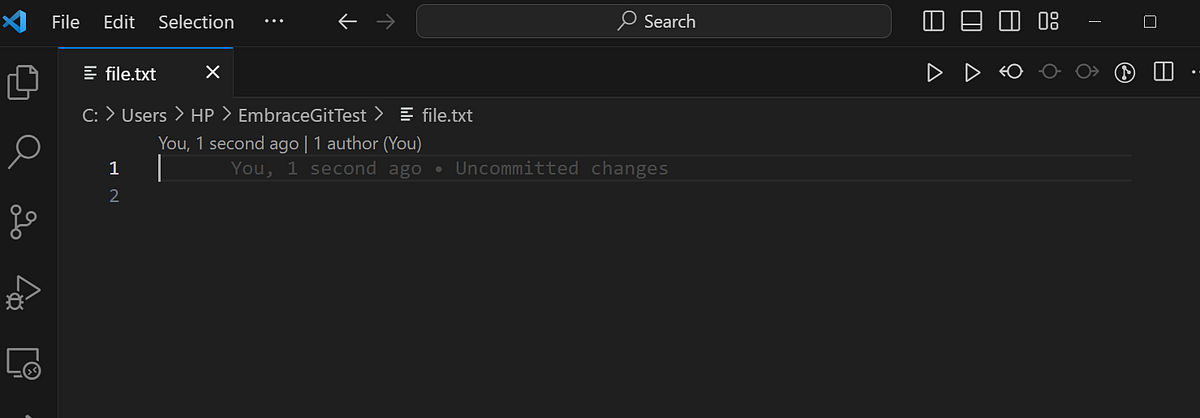
You should see something like the picture below, an empty file, recall that you modified this same file in the master branch, why is it like this? Recall I told you a branch is an independent entity that can exist alone without disturbing the original copy or project. Well, in git when you create a branch it is created with the most current changes at that moment in time, it does carry the changes of the master or any other branch after its creation it is independent starting from that moment, so when a change is committed to the original branch it will never know that change is made, and when a change is made to it the original branch (master) too, the feature or topic branch will never know that change was made to it either.
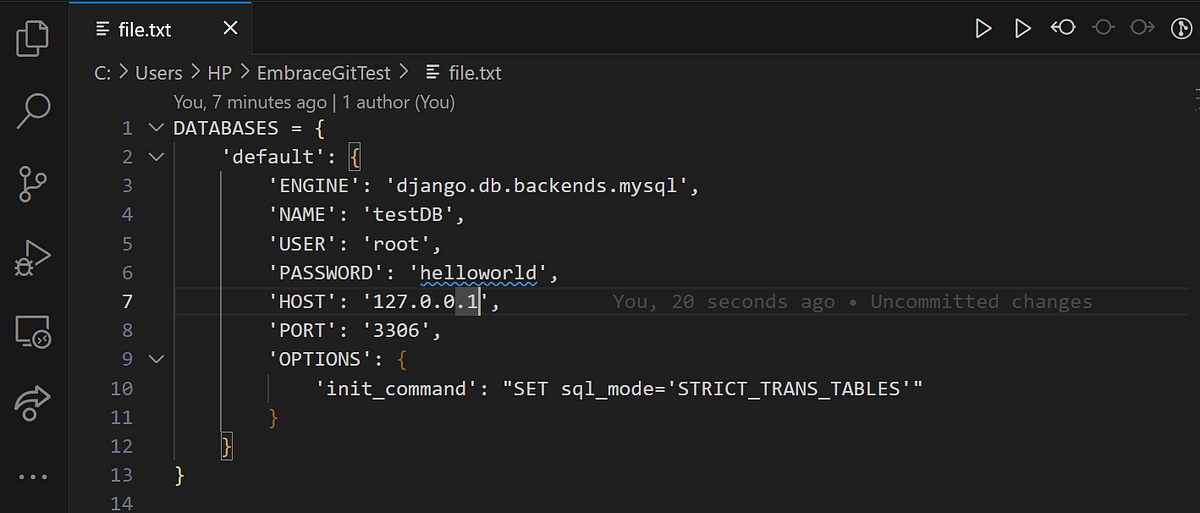
I am currently doing a lot of DevOps, technical writing, and Backend related projects practically, if you want to connect with a nice, fresh guy on Twitter in the DevOps space just take a few seconds to click the link Alpheus and connect I will ensure to connect back, I will be pasting a Django database connector on my file, you could paste anything what so ever of your choice.
Save the file exit the text editor and go back to the “git bash” terminal.
Check the status of the file, it should be modified with the highlighted in red as usual using the “git status” git command, add it to the staging area using “git add file.txt”, then commit the file using “git commit -m 'anything of your choice that describes the change' ” which means you have taken a snapshot of the changes you just made, I strongly believe you know how to do this, so there will be no pictures.
Note, that you have two different changes in two different branches and git does not know about these changes, the way you can make git know about the changes is by merging the changes and resolving the conflicts that may arise. How do I merge changes right? I know that is your next question Go to your git bash terminal, and checkout (switch) to the master(main) branch if you are not on it, confirm you are on it with the “git branch”.
If you aren’t like me, use “git checkout master”.
Confirm you are on the main (master) branch.
Now write this command to merge your change “git merge feature”. Recall to merge the branch you made your changes in, I used the “feature” branch because that’s where I made my changes.
Merging Branches
There are several types of merges which are fast-forward, merge-commit, rebase, and squash merge. I will be using the fast-forward merge here don’t worry you don’t need them in this article, I will write about them later, if you want me to write on them be sure to hit me up on Twitter in seconds Alpheus.
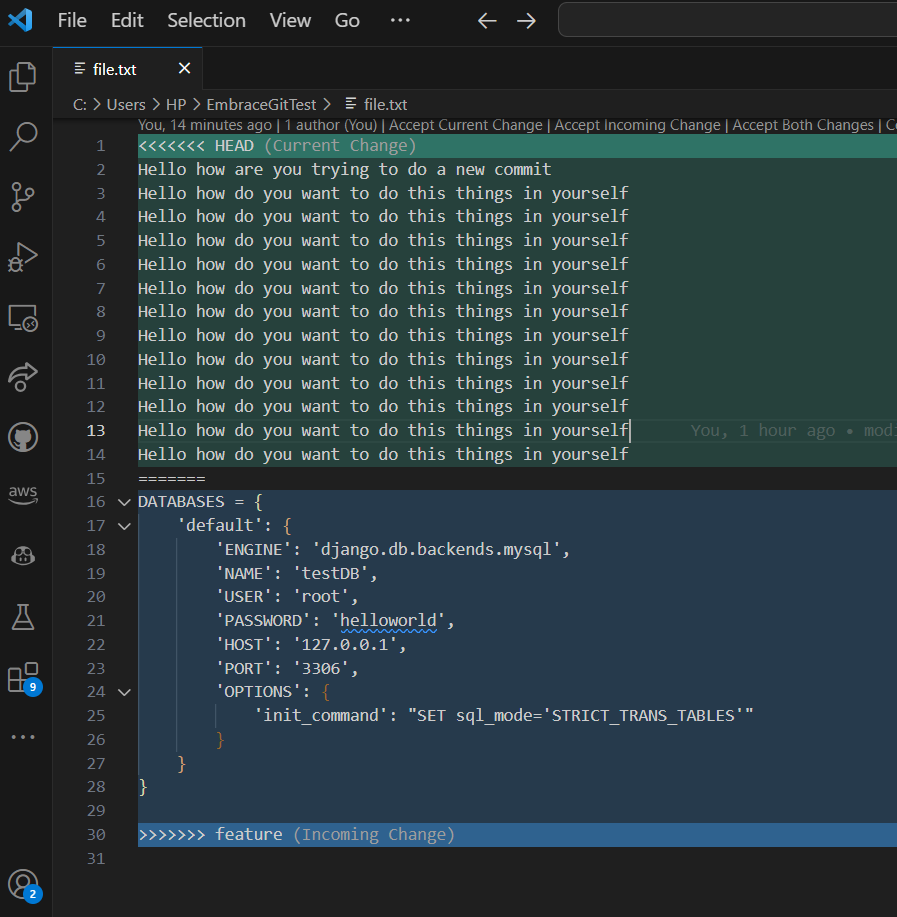
If you carefully take a look at the picture above you will see that a conflict occurred, if you recall a conflict is a serious disagreement between two items and git needs you to make a decision about how these items(files) are to be written so someone changes or your changes don’t get missing(discard) a precise decision must be made by you. A conflict can only occur if a file or files is modified in two different branches and a merge is to be made.
Resolving Conflicts
Identifying conflicts
Open the file using Visual Studio code.
You should see something like the picture below.
Resolving Conflicts Manually
As I said in git, when a conflict occurs and you need to resolve it, the conflict markers are enclosed within <<<<<<, =====, and >>>>>>. These markers are used to indicate where the conflicting changes exist in the file, below are what they represent:
1. <<<<<<<: This marker indicates the beginning of the conflicting changes in the current branch. The content after <<<<<<< is the change from the current branch. If you carefully look at the end of the starter marker <<<<<<<<, you will see “current change” and if you look at the end marker >>>>>>> you will see “feature” the branch am trying to merge.
2. =======: This marker separates the conflicting changes from the current branch (above) and the changes from the incoming branch (below). This means in the picture above the changes coming from the “feature” branch are separated from the “current branch” content which is above them ========= and below is the feature branch content starting with “ DATABASE = { ……….blah blah blah …..}”
3. >>>>>>>: This marker indicates the end of the conflicting changes in the incoming branch. The content after >>>>>>> is the change from the incoming branch.
When you encounter these conflict markers in a file, you’ll need to manually edit the file to resolve the conflict by choosing which changes to keep and which to discard. Once you’ve resolved the conflict, you should remove the conflict markers, leaving behind the desired content. After resolving all conflicts in the affected files, you can then commit the changes to finalize the merge or continue working on your project.
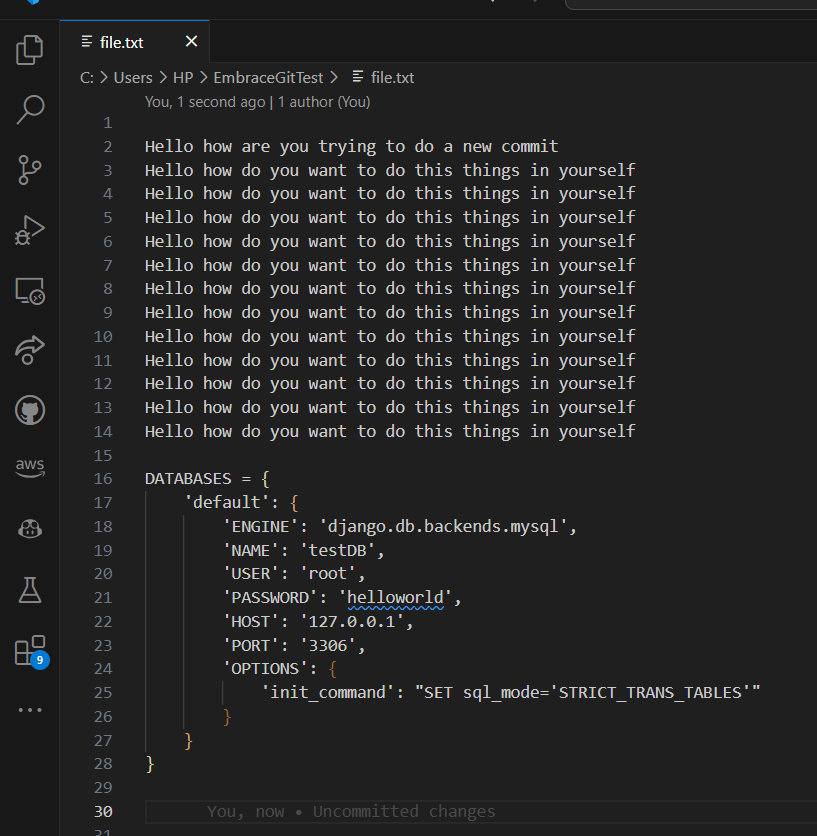
Now we have removed the markers and saved the changes we want to keep and not discard, ensure to save the changes after removing the markers, return to the git bash terminal, view your status using “git status” and add the changes to the staging area and lastly commit your changes using “git commit -m 'any message of your choice' ”.
Now view the “file.txt” using the visual studio code “code file.txt” you just merged to ensure you correctly carried out the merge and resolved the conflicts that came up properly.
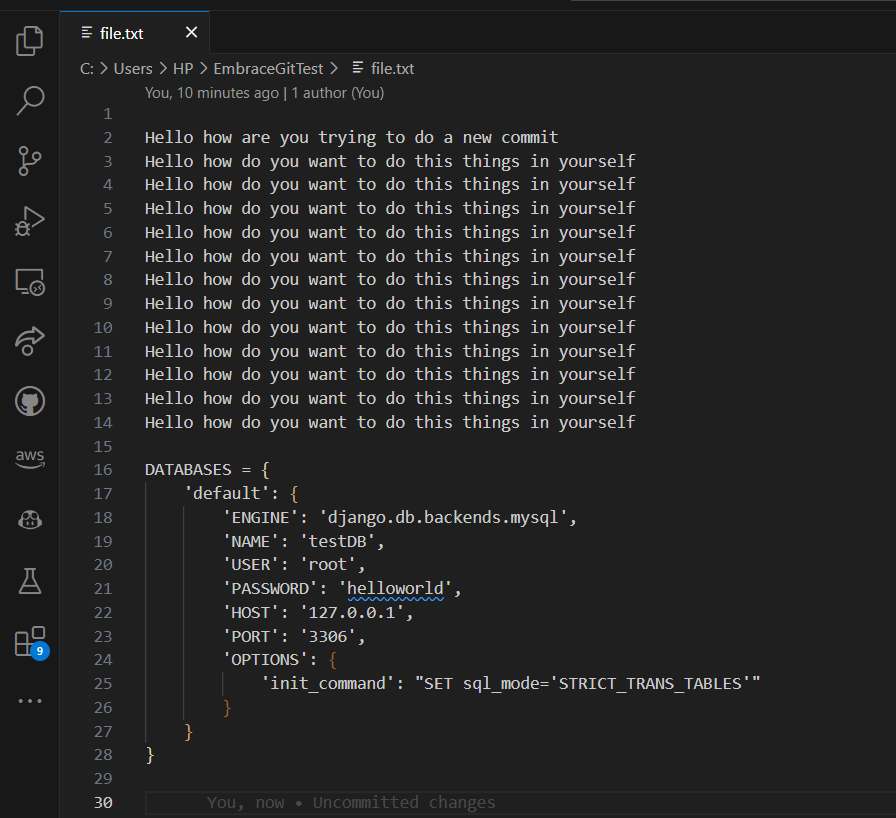
If you see the picture below, congratulations you just learned how to merge and resolve conflicts manually.
Cloning a Remote Repository
1. Start by cloning the Git repository to your local machine using the “git clone” command. Replace <repository URL> with the actual URL of the repository you want to work on.
Use a git hosting provider, what we will be using is GitHub, create an account with GitHub using this link GitHub
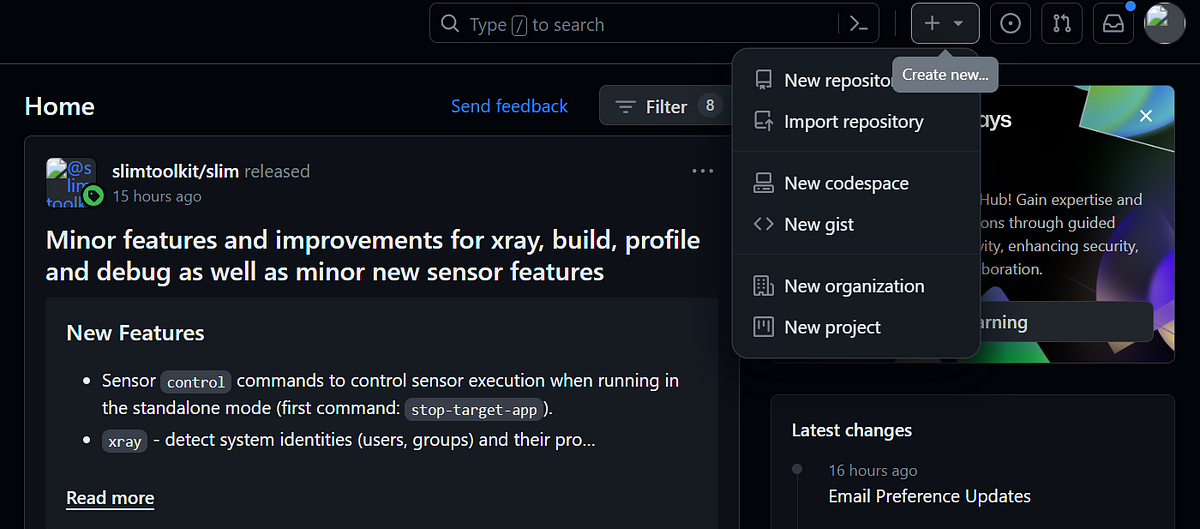
Once you create your GitHub account, on a desktop you will see a “+” symbol, at the top menu.
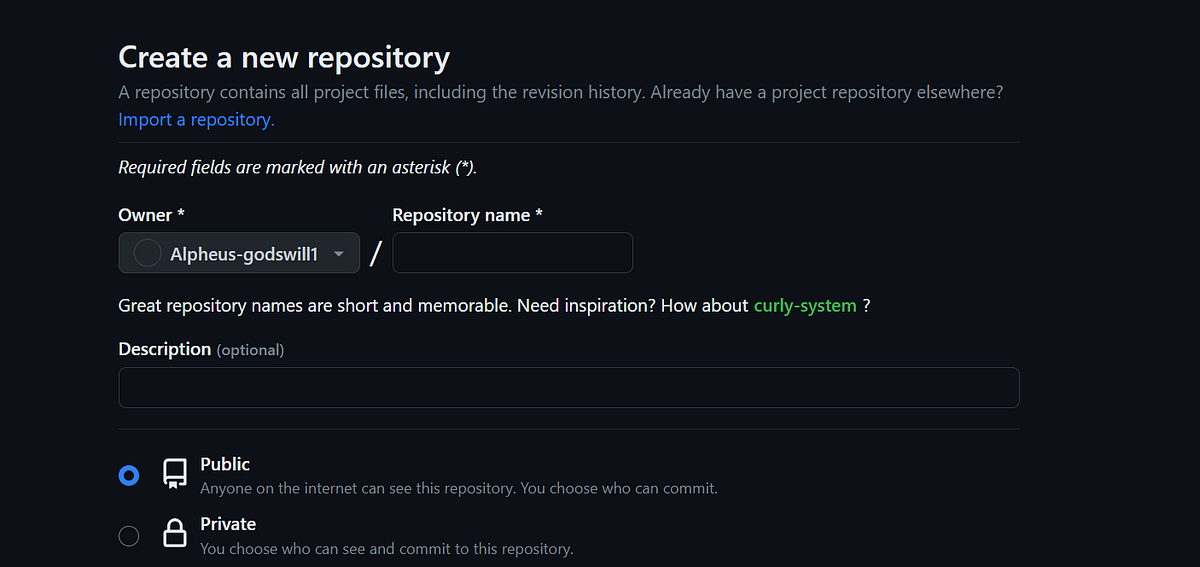
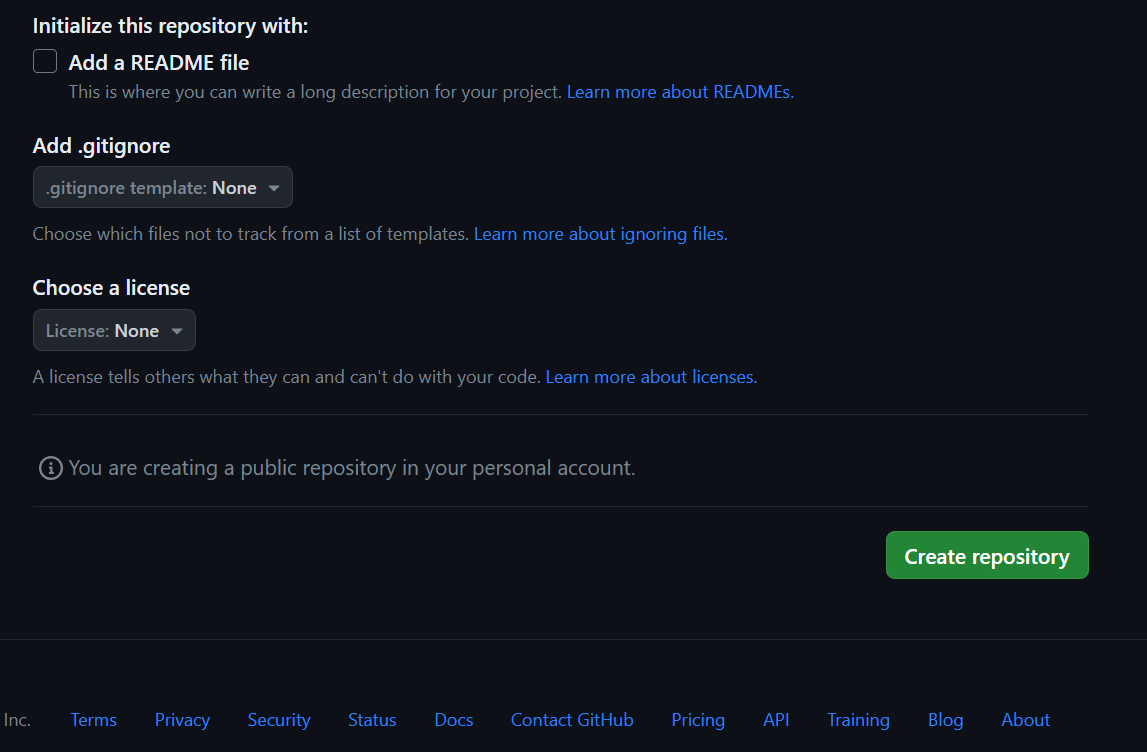
Click on the “+” symbol, a menu will pop up, click on the new repository. You will see a picture like the one below.
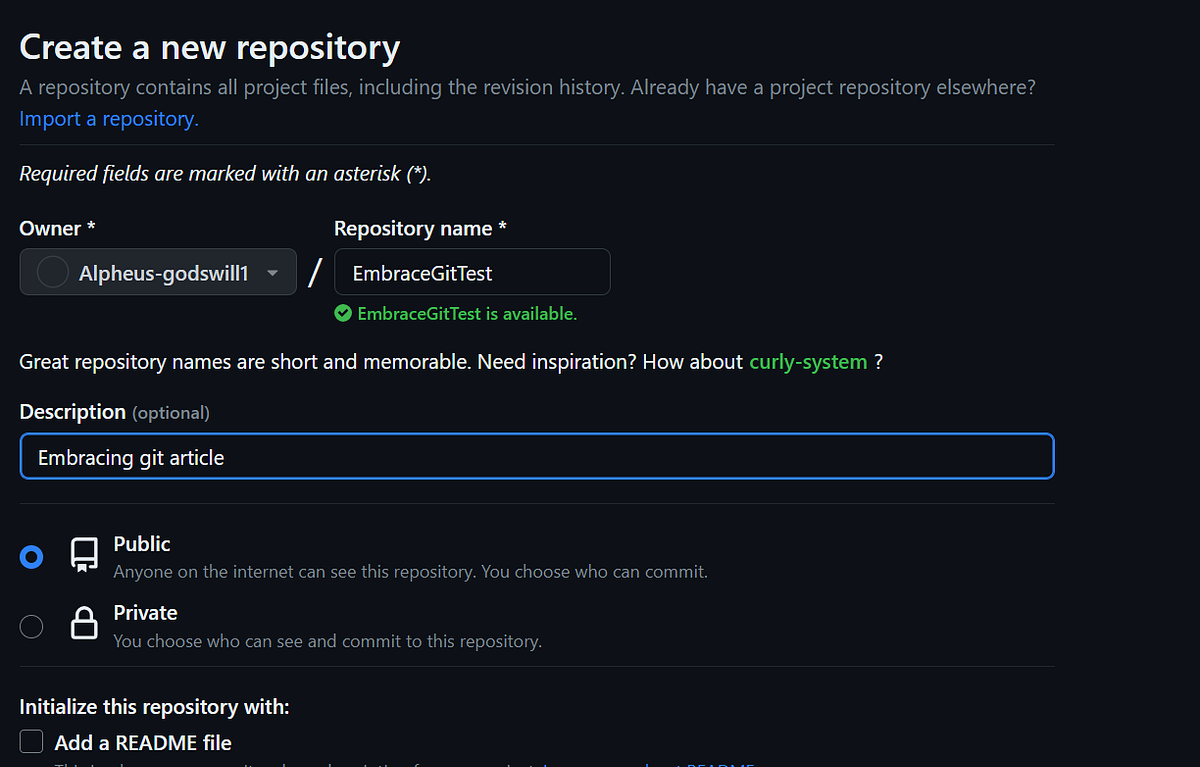
Fill in your details my repository name is “EmbraceGitTest”. Scroll down to the bottom and click “Create repository”.
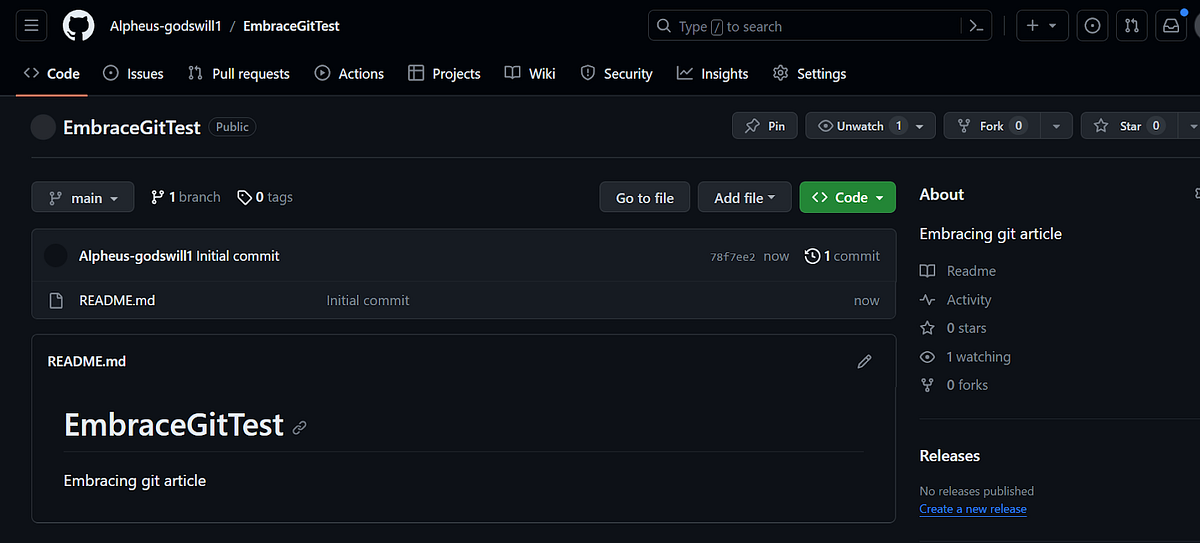
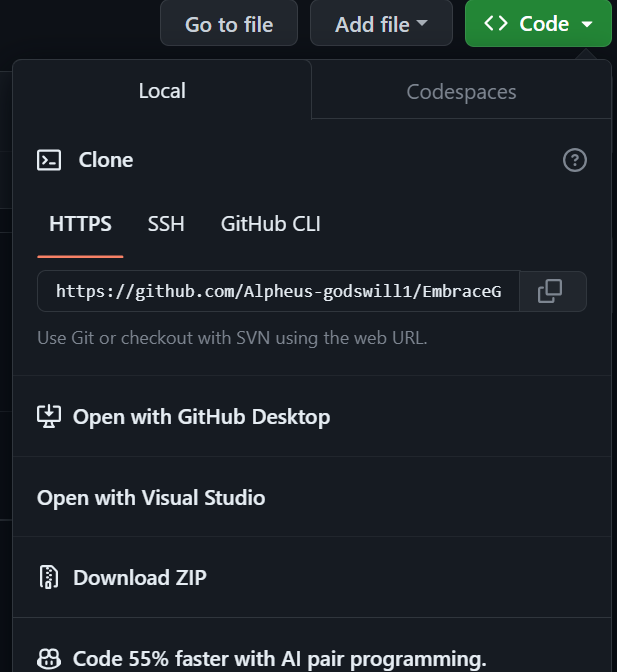
You should see a dashboard like the one below, click on the green button “<>Code ”
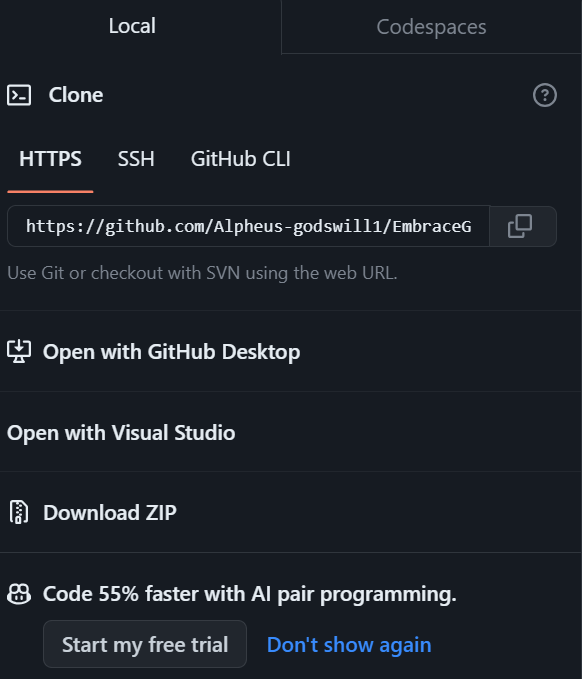
You should see a picture looking like the one below, click on the HTTPS or the SSH label, and copy the URL. But for this article, we will be using HTTPS URL, SSH can be used but you will need to set up a private key which I won’t cover here.
1. Go back to your Git Bash terminal and print your working directory using the command in the picture below.
2. Now clone the remote repository using the “git clone” on your working directory. I have changed to a directory which is my C-drive directory (local disk) using “cd”. But if you don’t know how to do that just “cd ..”, and git clone the HTTPS URL you copied ( follow the picture below )
Now “cd” into the directory you just created, follow the picture below.
Open the directory using Visual Studio code editor. Use the picture below.
Pushing Changes to a Remote Repository
If you want to push a local project (project on your local machine) to a remote repository you need to connect the local repository to the remote repository.
- This is how you connect your local repository to your remote repository, recall the repository you created on GitHub, yeah that one, that’s what we are going to use.
Go to GitHub, log in with your credentials, and open the repository. Click on the “Code” label with a green background, copy the HTTPS URL, and go back to the “git bash” terminal.
This is what is going to show when you click on the code label tag.
Create some files on the directory you created, using this Linux command.
“touch file.txt file2.txt file3.txt”
Check the status of the directory using the “git status” command.
By now you should know how to add a file to the staging area, the create a commit using the commands “git add . ” And “git commit -m 'a descriptive message of your choice' ”. Look at the pictures below.
All that we were arranging was trying to set up content so we could push them to GitHub. Now let’s push. Go back to GitHub and copy the HTTPS URL, you are going to use it now.
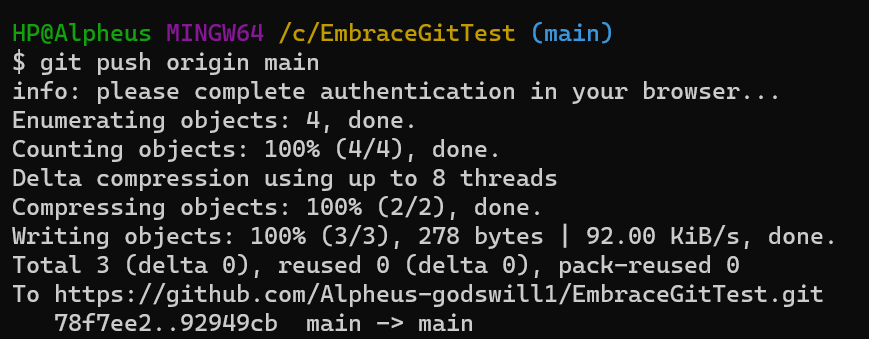
If it tells you remote origin already exists, you are still OK, otherwise, it will give a message saying that the connection was successful. Lastly, to complete the push, follow the picture below.
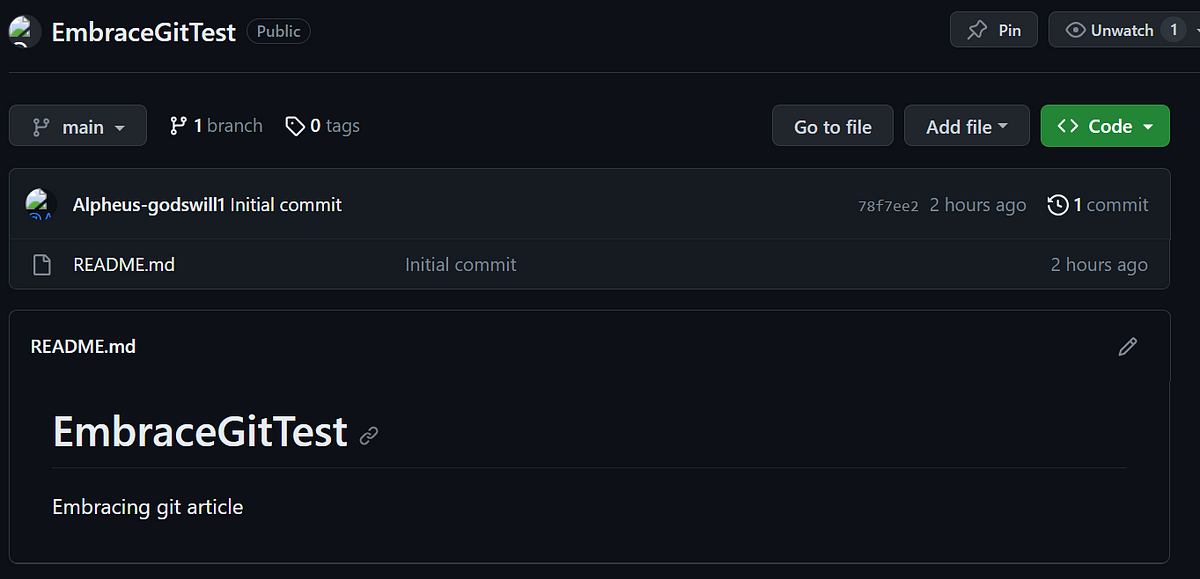
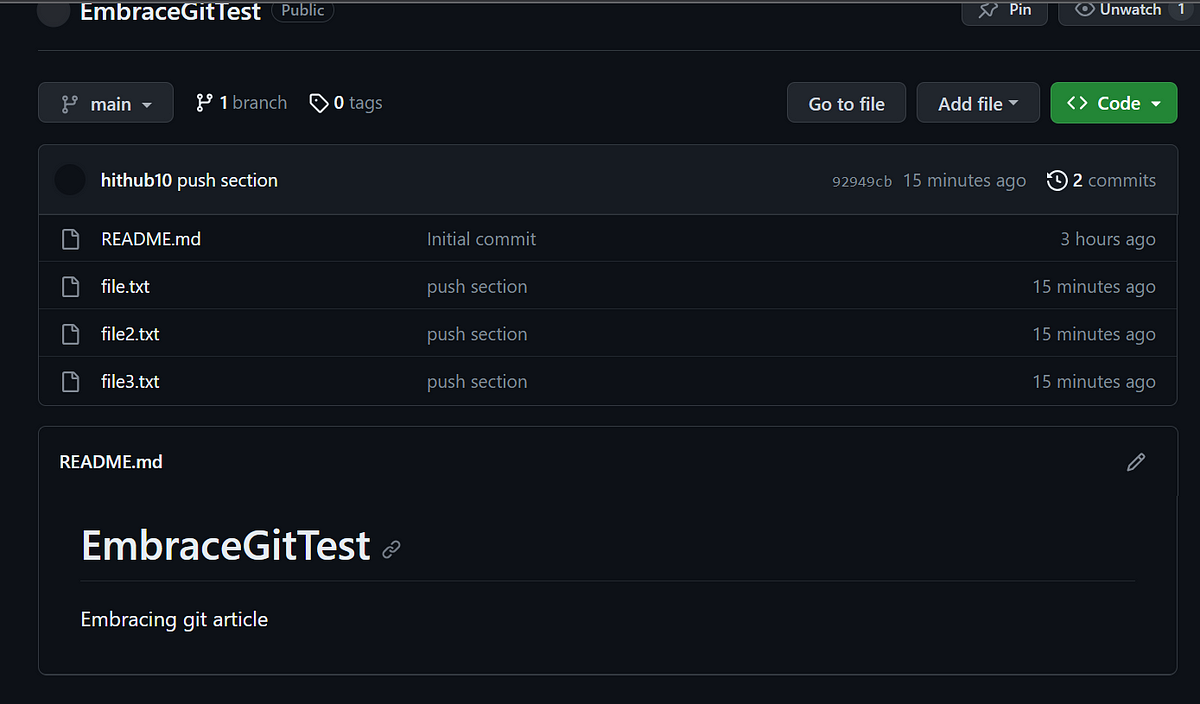
If it produces the message below the “git push origin main” command in the picture above, congratulations you have successfully pushed the content to your remote repository. To confirm your push was successful, go to GitHub and refresh your repository page.
Is a wrap, your files are in the remote repository, as you can see.
Conclusion
In the course of this article, we have embarked on a journey exploring the ever-evolving world of Version control systems particularly Git. I’ve shared insights, knowledge, and a piece of my passion for coding by embracing Git a very great distributed version control system, and I’m excited to continue this journey with you. But this article is just the beginning. It’s a glimpse into the world of exciting projects I’m working on.
Whether it’s code that pushes the boundaries of innovation, apps that make our lives easier, or platforms that connect and inspire, I’m dedicated to creating and sharing the very best. Your involvement and support would make these endeavors even more meaningful.
Join me, especially on Twitter, and GitHub to stay updated on the latest projects, and dive deeper into the realm of DevOps, Technical Writing, Backend, and hands-on quality real-world problems and projects, and am not talking of a todo list, am talking of scaling, microservices, Networking systems, solid Web applications, mobile app building etc. with standard system architecture from start to finish, ensure to connect on Twitter, we all going to learn a lot together, promise ❤️🥂. Together, we can innovate, inspire, and make a lasting impact in the tech world. Feel free to reach out via email (Harryalph9@gmail.com ) as well. I can’t wait to embark on this incredible journey with you and create a brighter, more exciting future through our shared love for coding and creativity


