Efficient OS Configuration: Setting up Ubuntu and CentOS on VirtualBox.

DevOps Engineer | System Design lover | Technical Writer
Virtualization has changed the way we use and manage operating systems, offering a flexible and efficient solution for development, testing, and deployment. Among the various virtualization platforms available, VirtualBox stands out for its user-friendly interface and solidly built features. In this guide, we'll explore the process of setting up Ubuntu and CentOS on VirtualBox, ensuring an efficient and streamlined OS configuration for your development and testing needs.
Prerequisite:
Ensure to give me a follow on Twitter (@Alpheus___) if you love DevOps, API, Linux, API, CICD, etc content.
Capability to access the BIOS of a Windows system and make alterations.
64-bit computer.
High Internet speed.
Windows 10/11, MacOs intel/M1 chip and above and Linux distribution.
Ability to read and follow instructions properly.
Enable VTx ( Virtualization Technology) in computer BIOS
Secure Virtual Machine.
After enabling VTx in your BIOS save it and reboot your system .
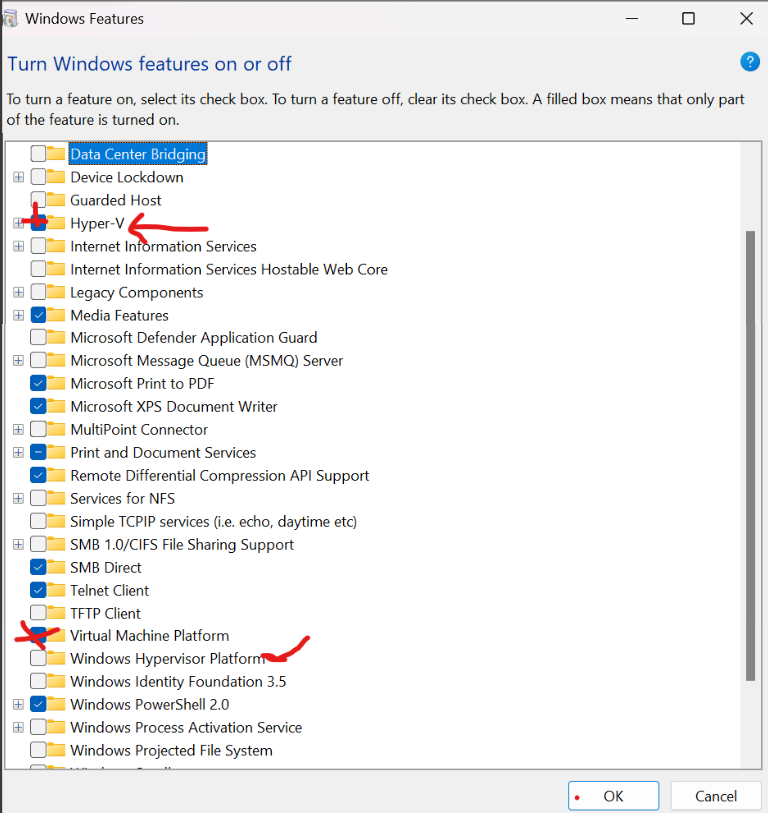
To enable virtualization using VirtualBox on Windows, certain components need to be disabled:
Microsoft Hypervisor.
Windows Hypervisor platform.
Windows Subsystem for Linux ( If you initially had it working ).
Docker Desktop.
Virtual Machine Platform.
On Windows search for this “ Turn Windows features on or off “ .
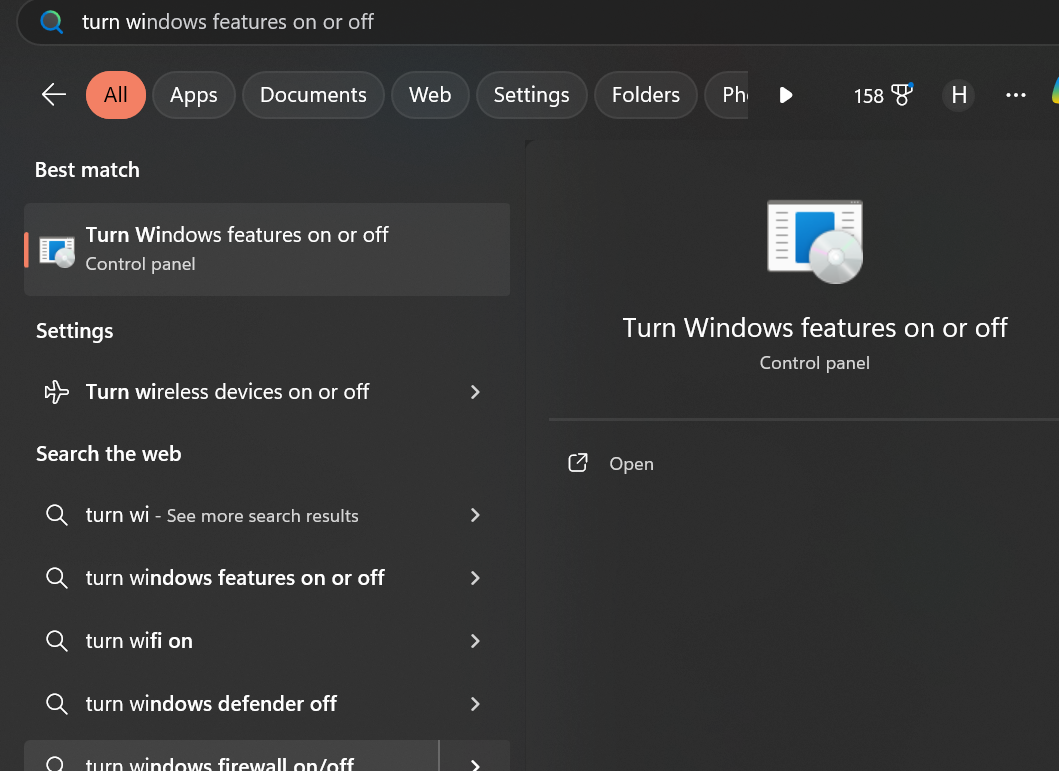
Open it and uncheck all the checked boxes running any hypervisor, if it has a hypervisor attached to it, even if I have not explicitly mentioned it in this article uncheck it.
Understanding Virtualization and VirtualBox
Before we go into the setup process, it's essential that we understand the concept of virtualization and understand how VirtualBox fits into the picture. Virtualization allows multiple operating systems to run simultaneously on a single physical machine in what we know as a VM (Virtual Machine) housing different operating systems individually with ease, enabling better resource utilization, isolation, and flexibility. VirtualBox, developed by Oracle, is a powerful open-source virtualization platform that supports a wide range of guest operating systems.
Preparing Your Virtual Environment
Setting up a virtual environment involves a few preceding steps to ensure smooth installation and operation. This includes checking hardware compatibility, enabling virtualization extensions in the BIOS, and allocating sufficient resources such as CPU cores, RAM, and disk space for your virtual machines during installation of the OS in the VMs.
Installing VirtualBox
To you can install VirtualBox on any host operating system, including Windows, macOS, and Linux.
The installation process is straightforward and typically involves downloading the appropriate package from the VirtualBox website and following the on-screen instructions. Once installed, VirtualBox provides a user-friendly interface for managing virtual machines.
The best I can say is use Chrome browser, search “Virtualbox Installation” the first link that shows up, click on it, and follow the installation process.
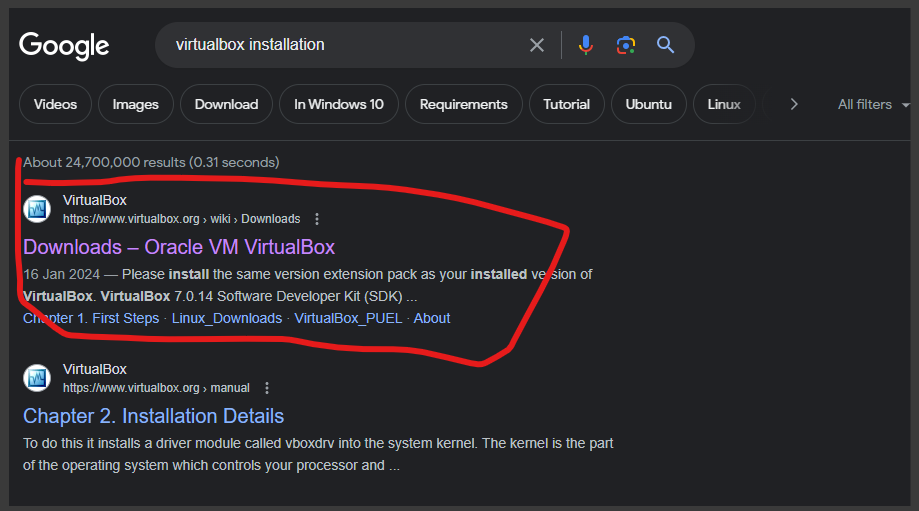
Once you are in, click on the package the suits your system.
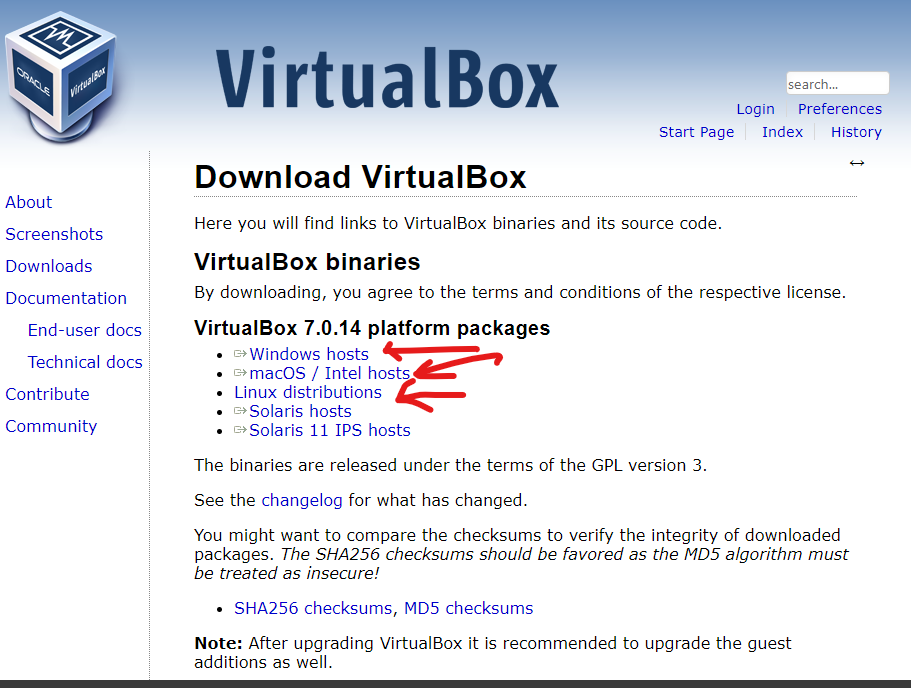
Downloading Ubuntu and CentOS ISO Images
Before we create virtual machines, we need to obtain ISO images of the “Ubuntu” and “CentOS” operating systems. These can be downloaded from their respective official websites or mirrors. Make sure to choose the appropriate version and edition based on your requirements.
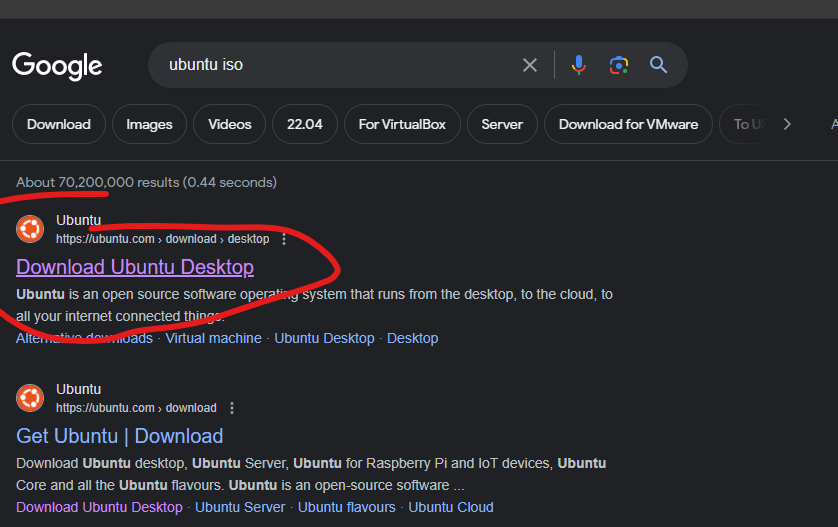
Click on the highlighted section in the image below:
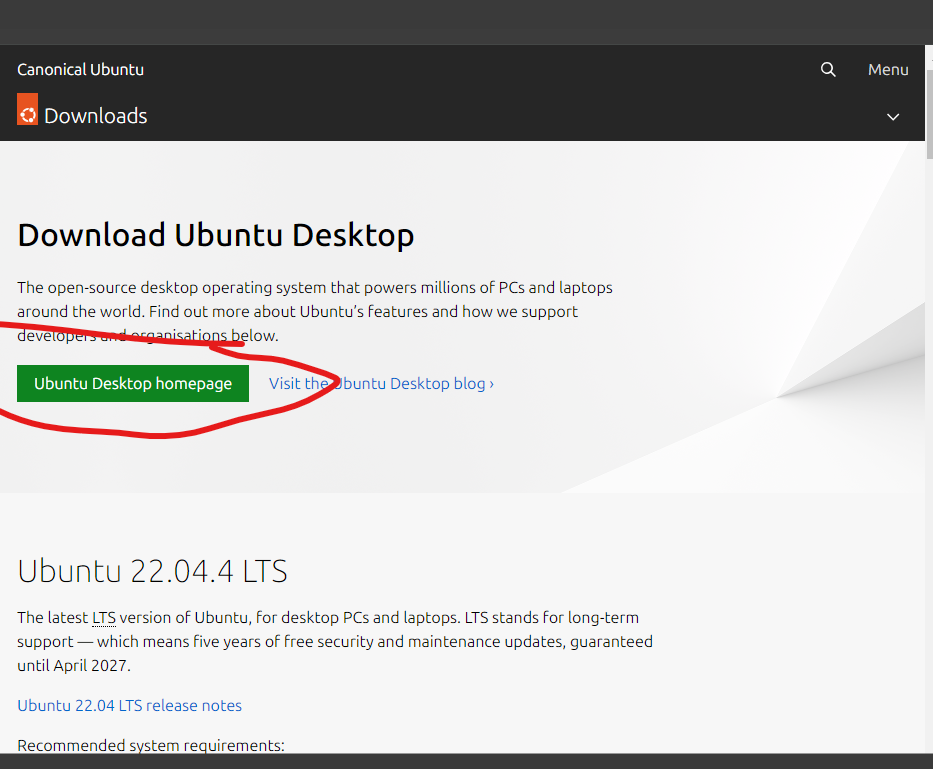
Once that opens click download your download will start.
Repeat the same steps for CentOs.
Creating Virtual Machines
With VirtualBox installed and ISO images downloaded, you can proceed to create virtual machines for Ubuntu and CentOS. This involves launching VirtualBox, clicking on the "New" button, and following the wizard to configure parameters such as name, type, and memory size for each virtual machine.
Make sure to install a virtual box on your machine.
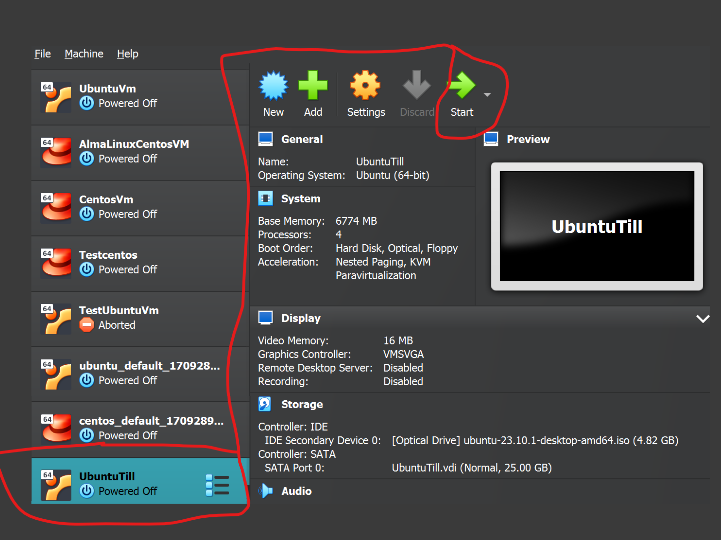
When that is done open the virtual box it should look like the image below
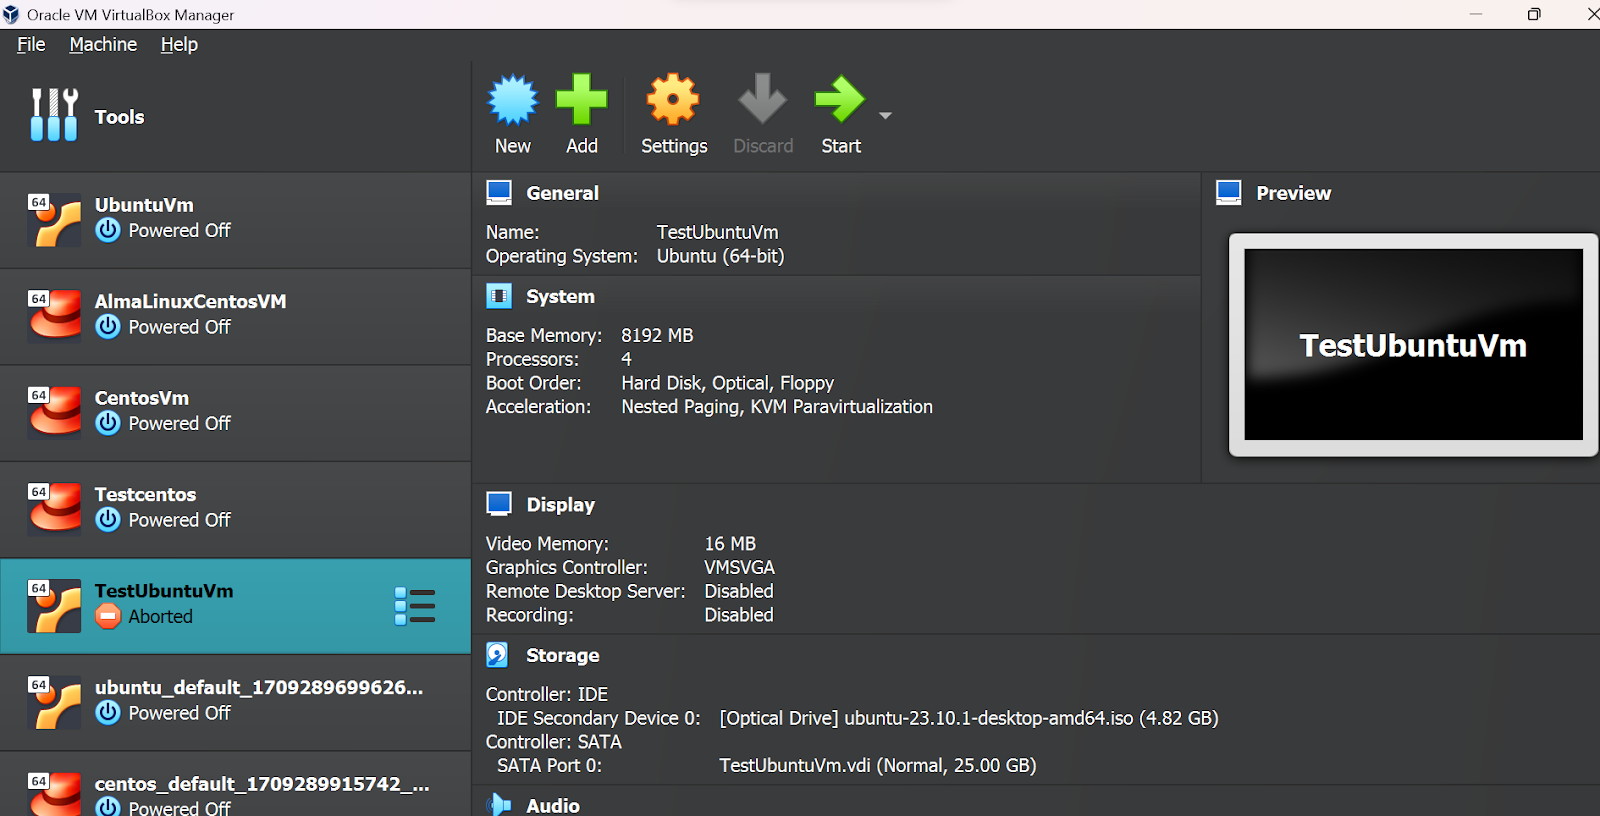
Don’t mind why I have so many VM's on my virtual box, I have been playing with Linux a lot lately 😂😂😂. Don’t forget to hit me up on Twitter (@Alpheus___)
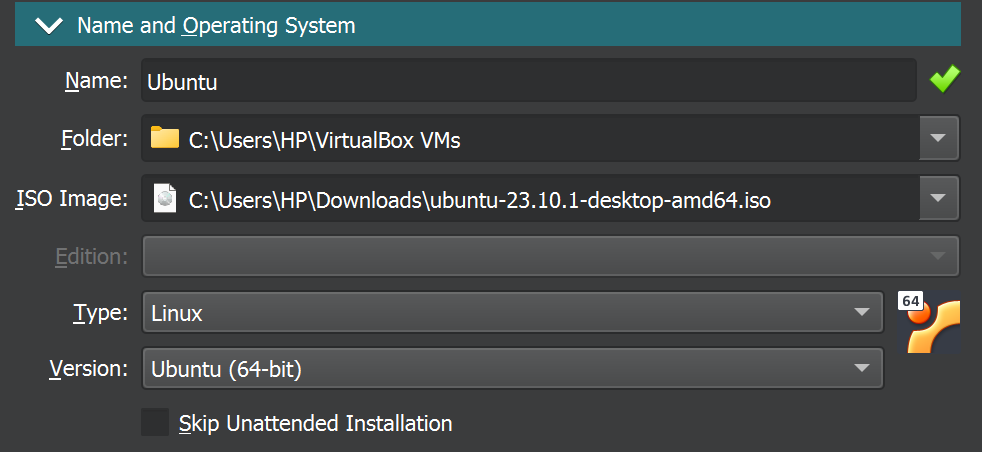
- Click on the button “New” with a blue color with a star shape.
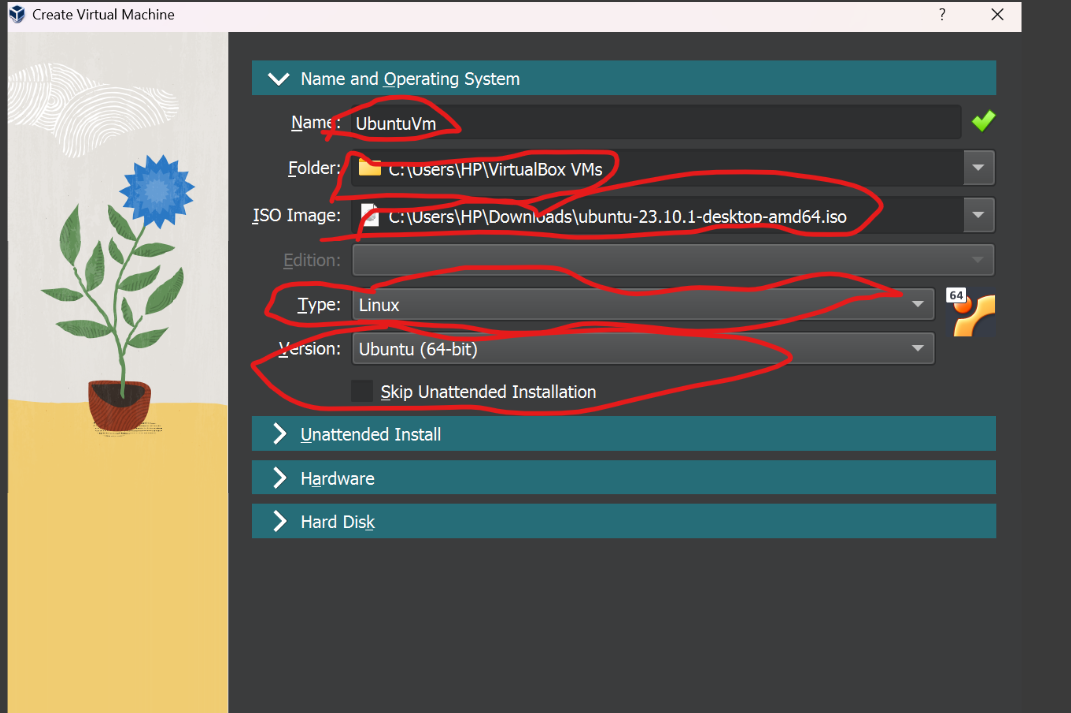
3i. Nam: Set Your VM with a name of your choice
3ii. Folder: This is a folder where your VM should be created and should be selected by default, but if that fails select one for it.
3iv. ISO image: select the Ubuntu ISO you downloaded earlier.
3v. Type: Select Linux but by default that should be selected based on the name you gave your VM.
3vi Version: That should be “Ubuntu (b4-bit) “
Give it a name you will remember and use, these details are very important when using your VM.
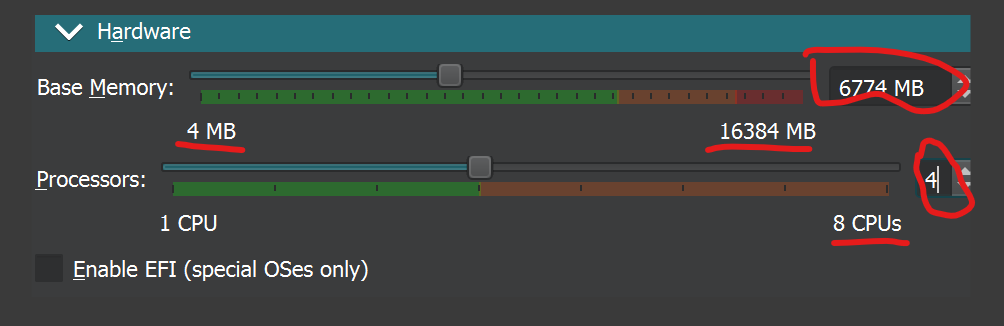
If you are using a 16GB system assign Base Memory to a little above 4GB = 4096MB and above, for CPU if you are using 8 CPU’s you can assign even 3 or 2 CPUs.
If you are using a 4GB Base Memory you can use has iof that and CPU = 1 assigned
For the picture above you can adjust yours to be evenly distributed.
If you are using the latest Virtual box you won’t see something like “ Create “ or “ Next “To create this VM open the section below and hit “Enter” on you computer
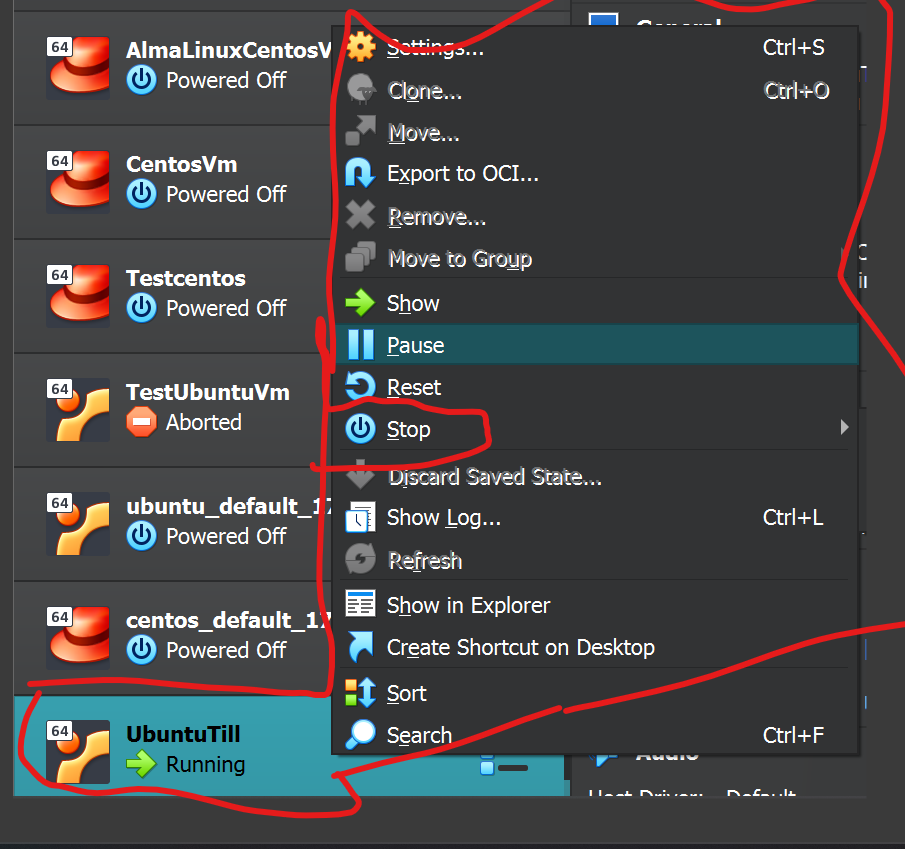
Once created it will start to run, right click on the VM select “ Stop “ and then click “ Power Off “
Configuring Virtual Machine Settings
Once the virtual machines are created, it's essential to adjust their settings for optimal performance and functionality. This includes adjusting parameters such as RAM allocation, enabling virtualization features, configuring storage options, and setting up networking.
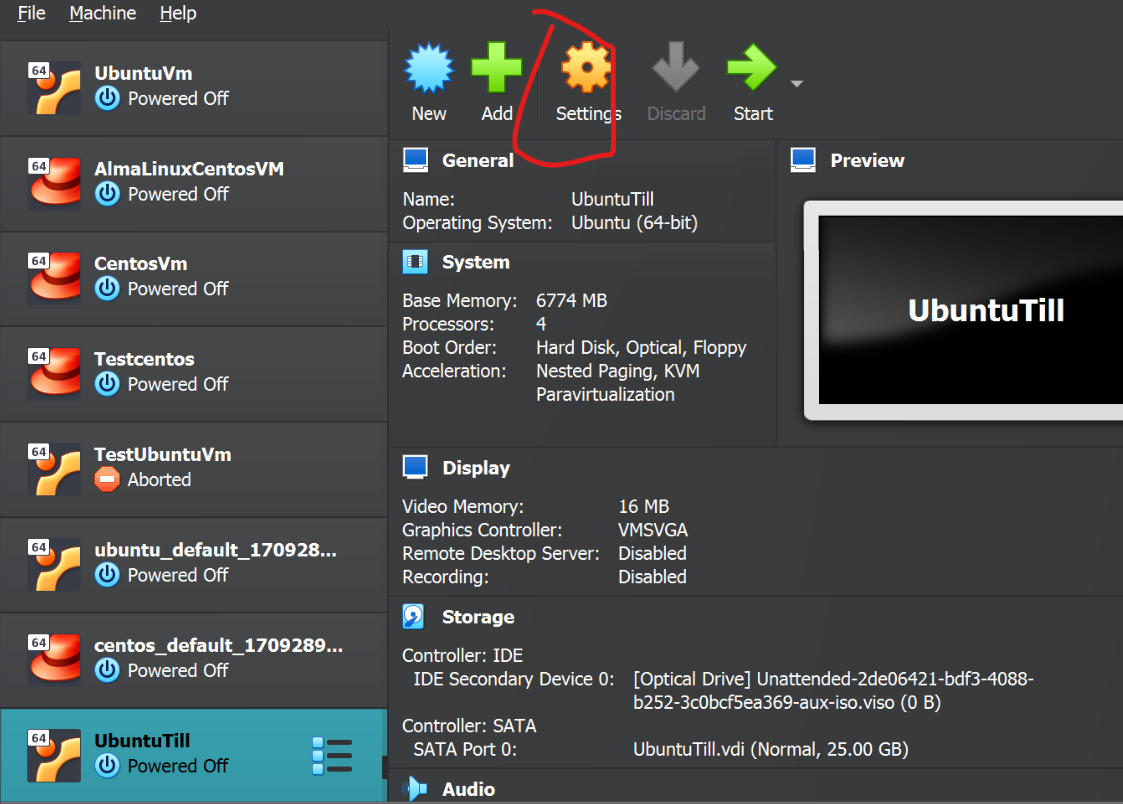
Once you are on that VM, emphasis on “on that VM“ click “ settings “.
Click on “Network.”
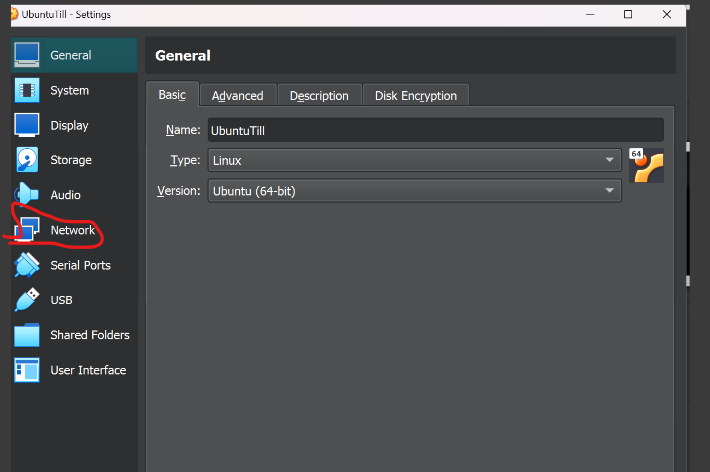
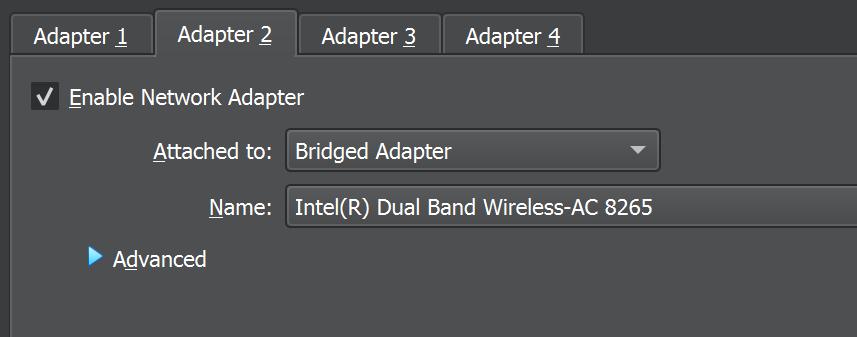
You will notice that “ Adapter 1” is taken, Open “ Adapter 2 “, and check “Enable Network Adapter.”
When you click “ Attached to : Bridged Adapter “
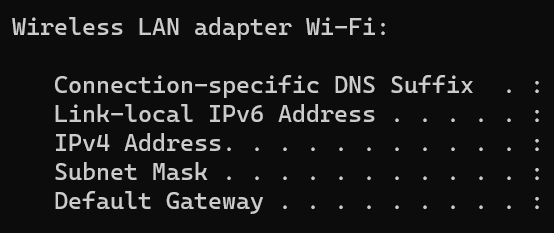
Now you don’t know the name of your NAT adapter to know that open the command line for Windows and type in “ ipconfig “
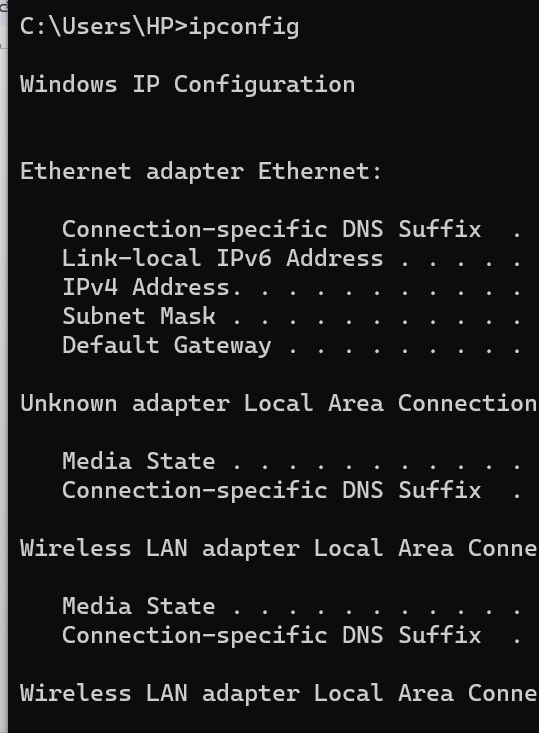
Ok, if you scroll down and see something like this:
Go back to your virtual box and choose exactly what I chose in the image below:
After that click on storage :
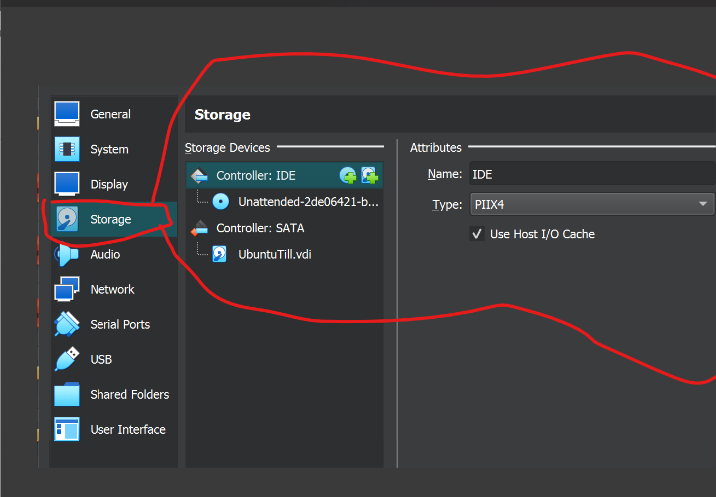
Click on the disk.
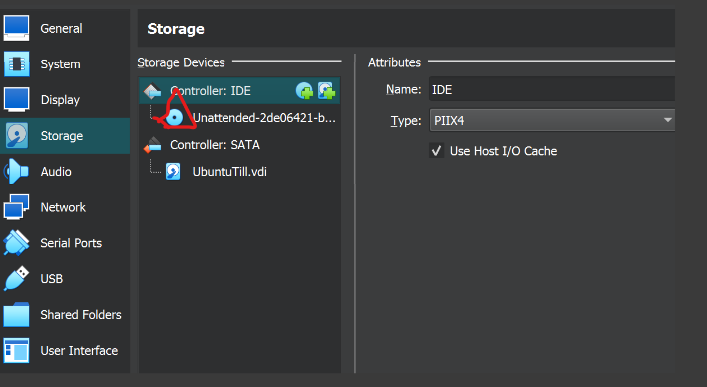
Select the “Ubuntu ISO” you downloaded by clicking this other disk:
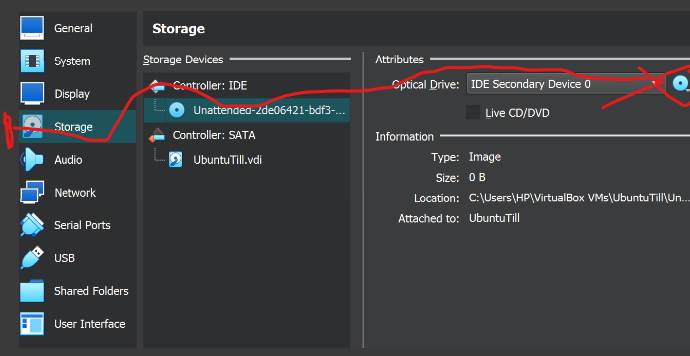
Then click on the disk symbol and check the “ Live CD/DVD “.
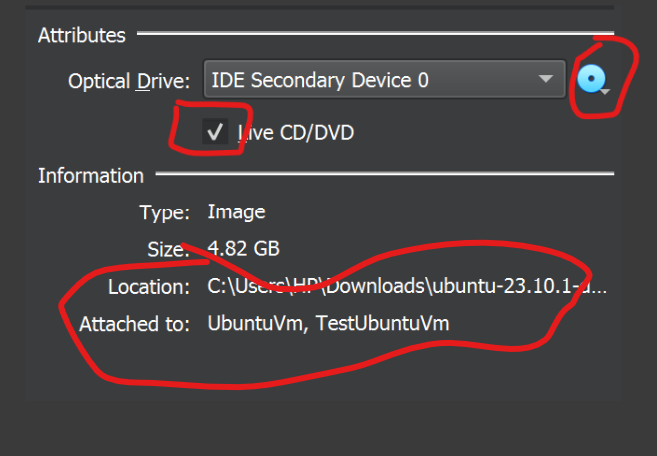
Click “ Ok “ and then click “ Start “.
Installing Ubuntu and CentOS
With the virtual machines configured, you can now proceed to install Ubuntu and CentOS. This process is similar to installing these operating systems on physical hardware, involving booting from the respective ISO images and following the installation prompts. Make sure to customize the installation as needed, including partitioning and package selection.
Once your mouse hovers over this interface and becomes invincible, press your “ right-ctrl “ and you will be able to
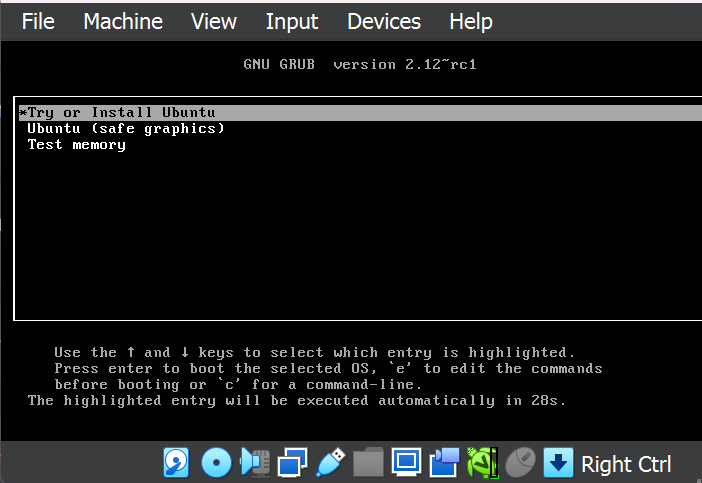
Select Ubuntu (Safe graphics )
Your interface should look like the one below.

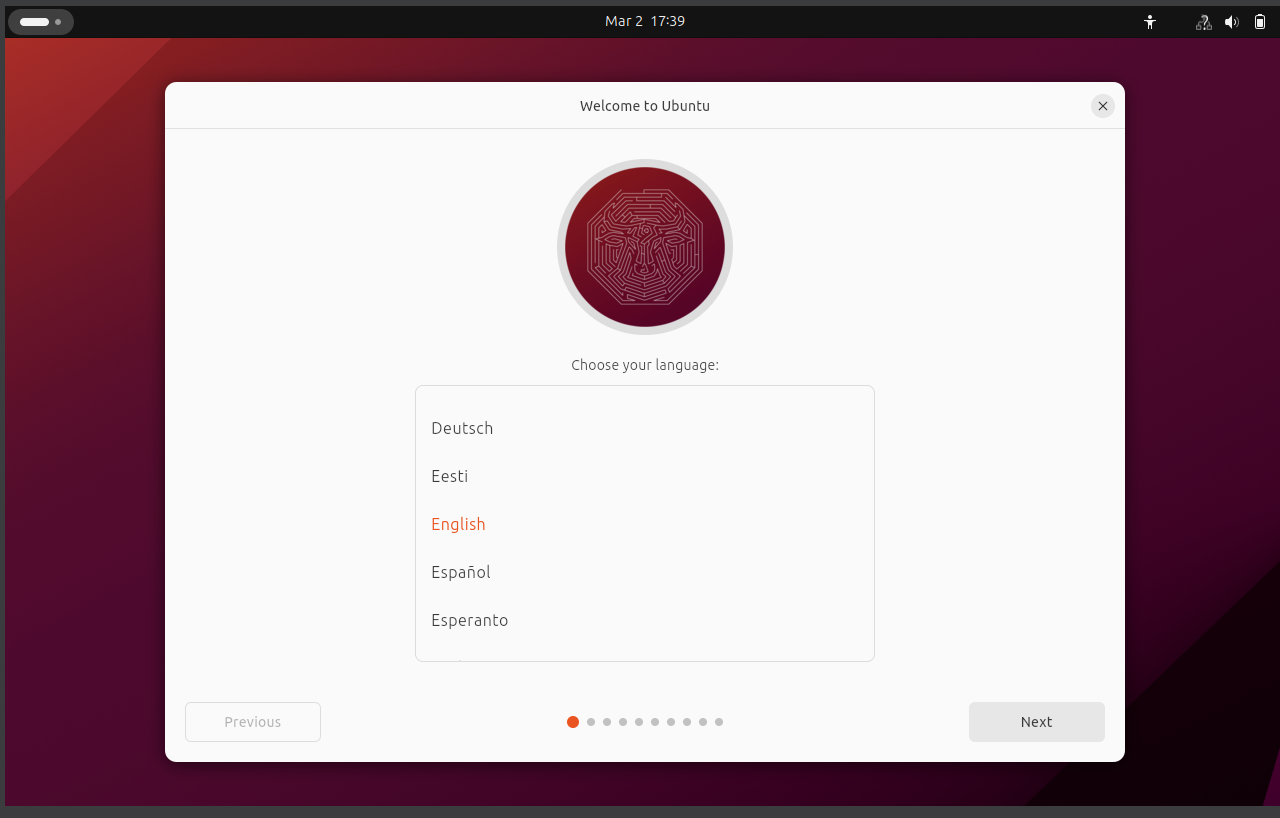
After that, you should see the image below, and select a language of your choice, I will go with “ English “
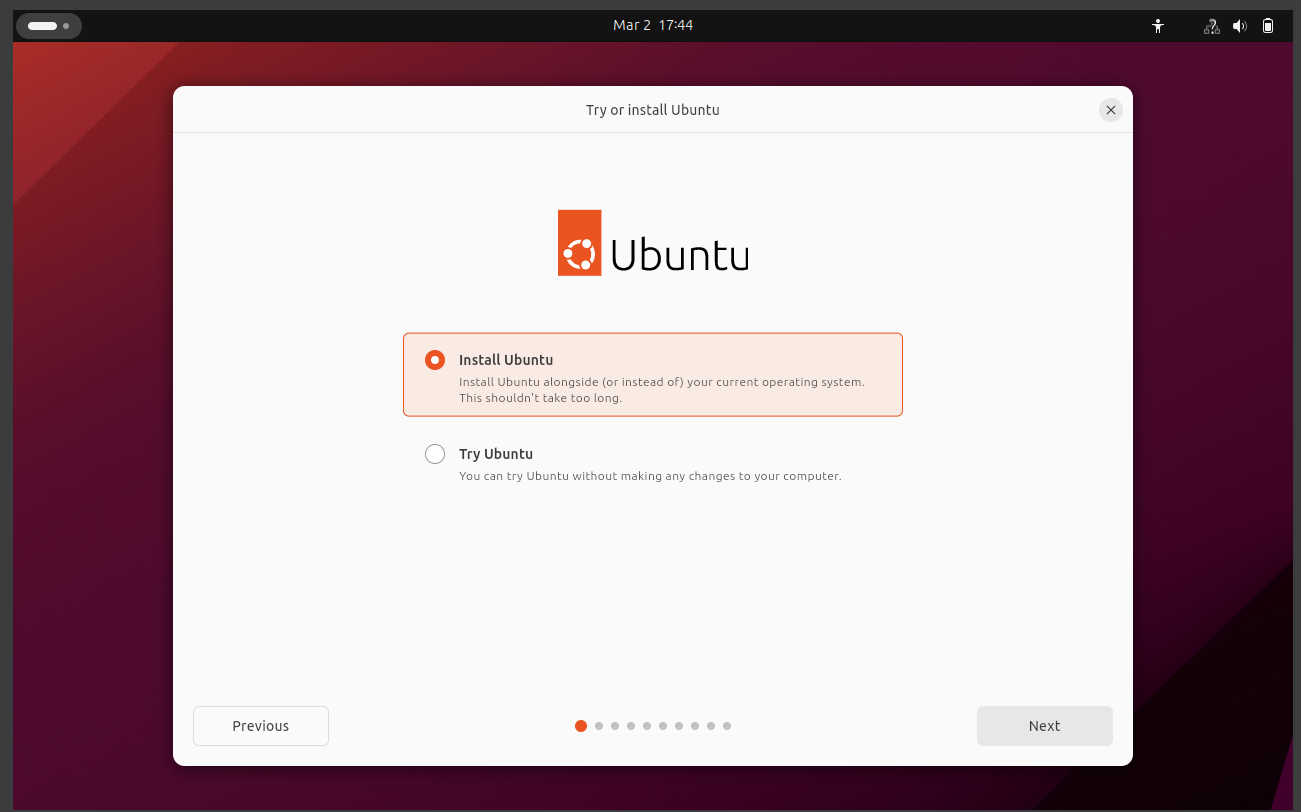
Select “ Install Ubuntu “.
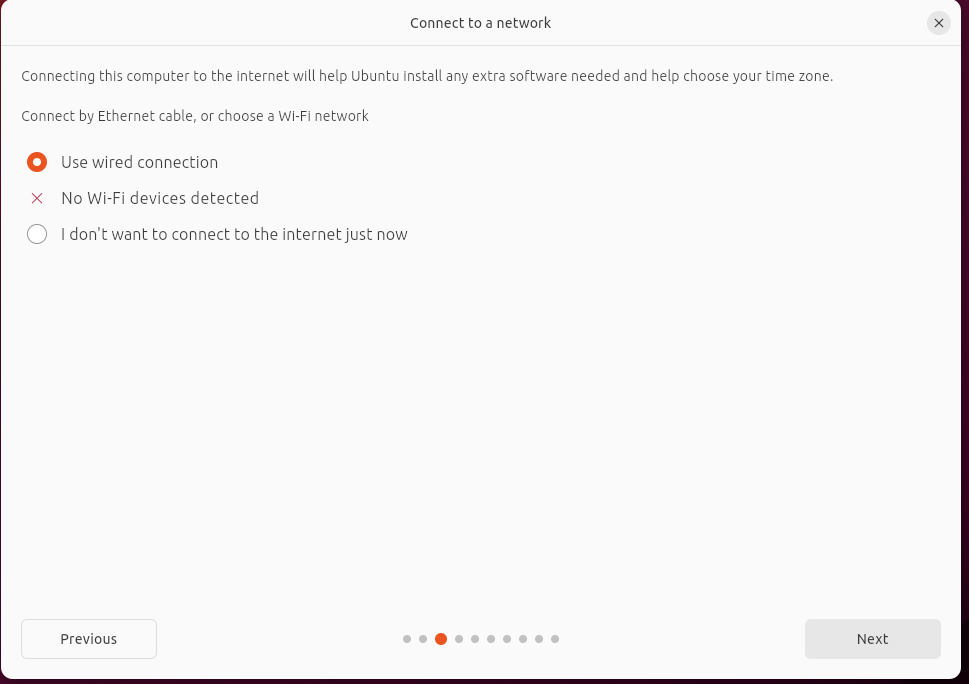
Select “ Use Wired Connection “ ,
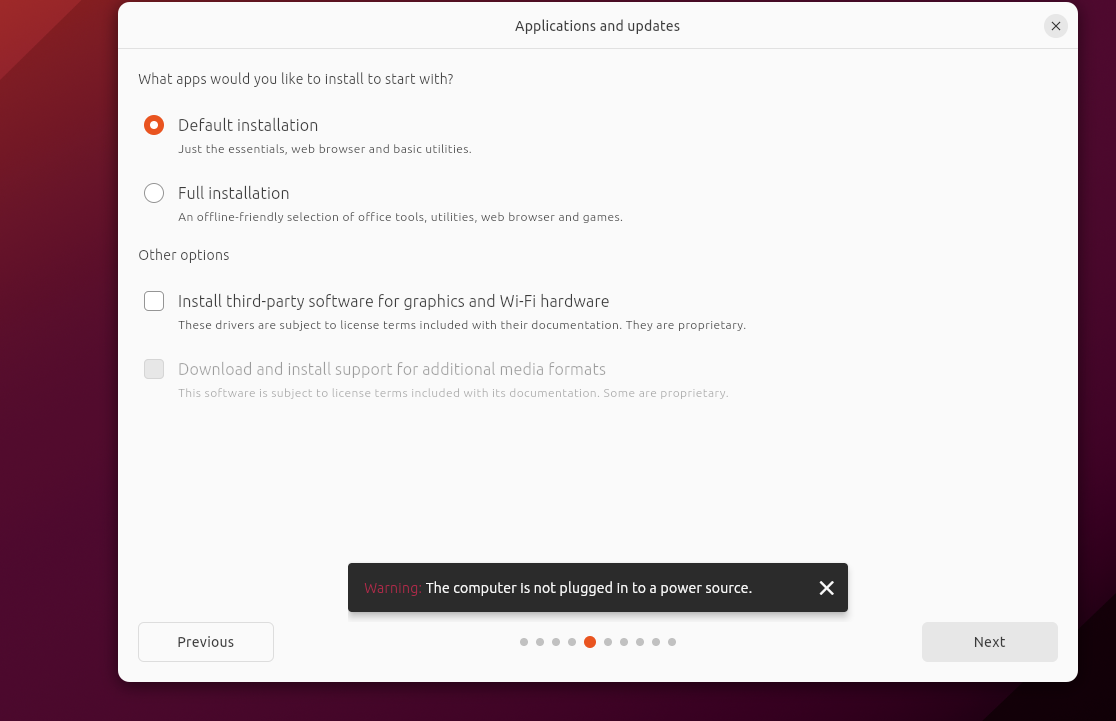
Select “ Default Installation “.
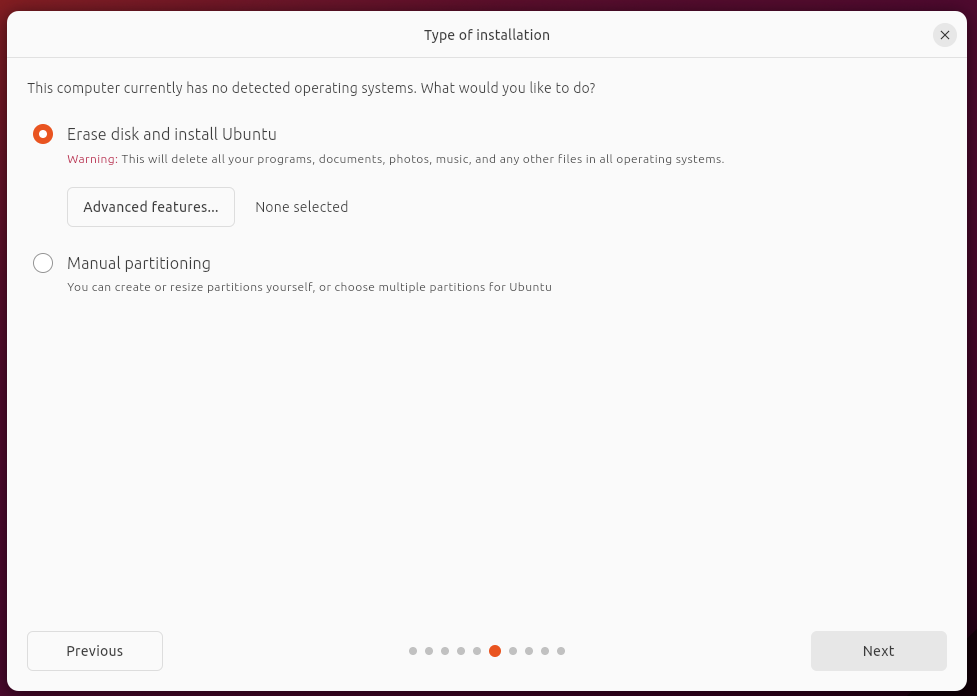
Select “ Erase disk and Install Ubuntu “. Don’t be afraid it won’t touch your information it is just a “ Virtual disk drive“created by Virtual Box, recall you were the one that set this up during the initial configurations.
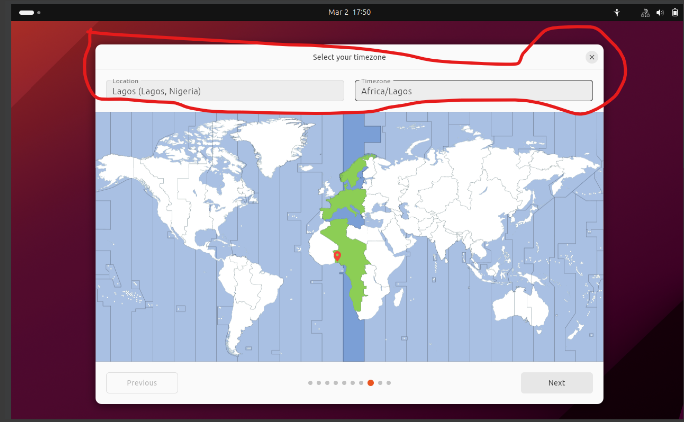
Click next, and select your Location and Timezone
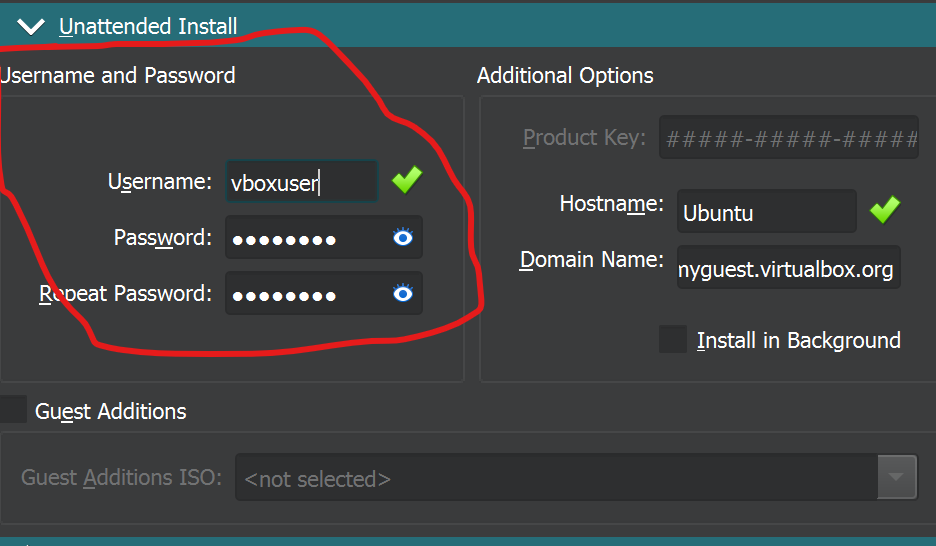
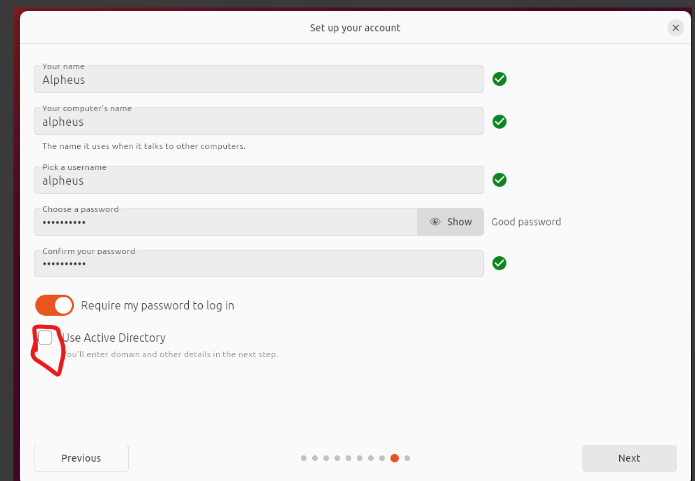
Click Next and fill out the form below with a name of your choice and a password of your choice.
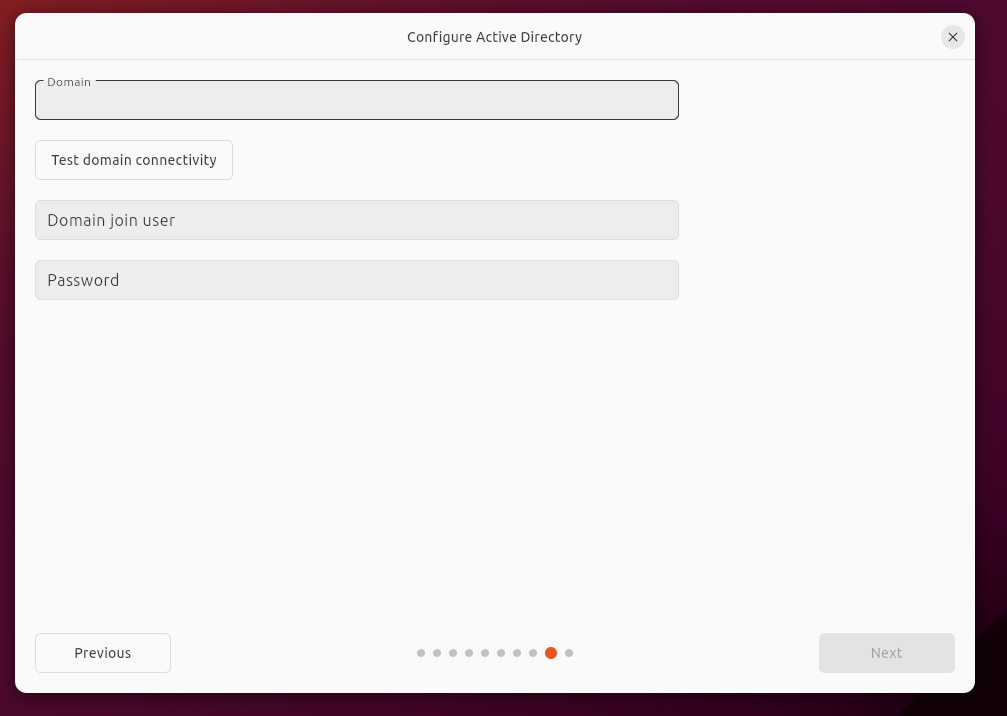
Don’t check the box “ Use active directory “
Don’t touch the image below, click next.
Click next again and you will be on your Ubuntu Operating System VM.

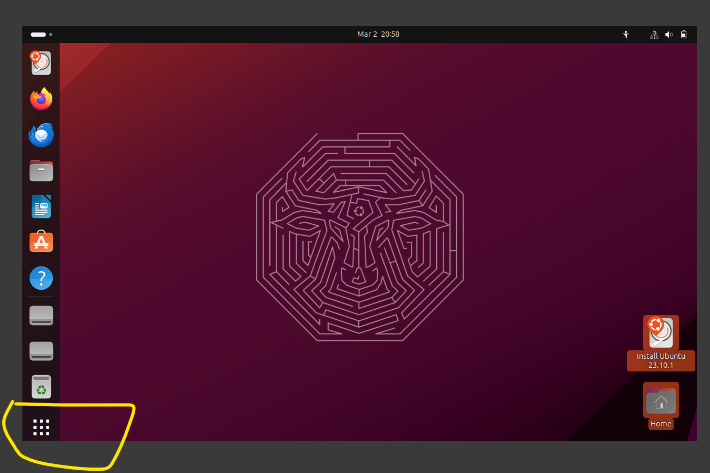
Click the menu tab I circled below 👍:
Type “Terminal “ and click enter.
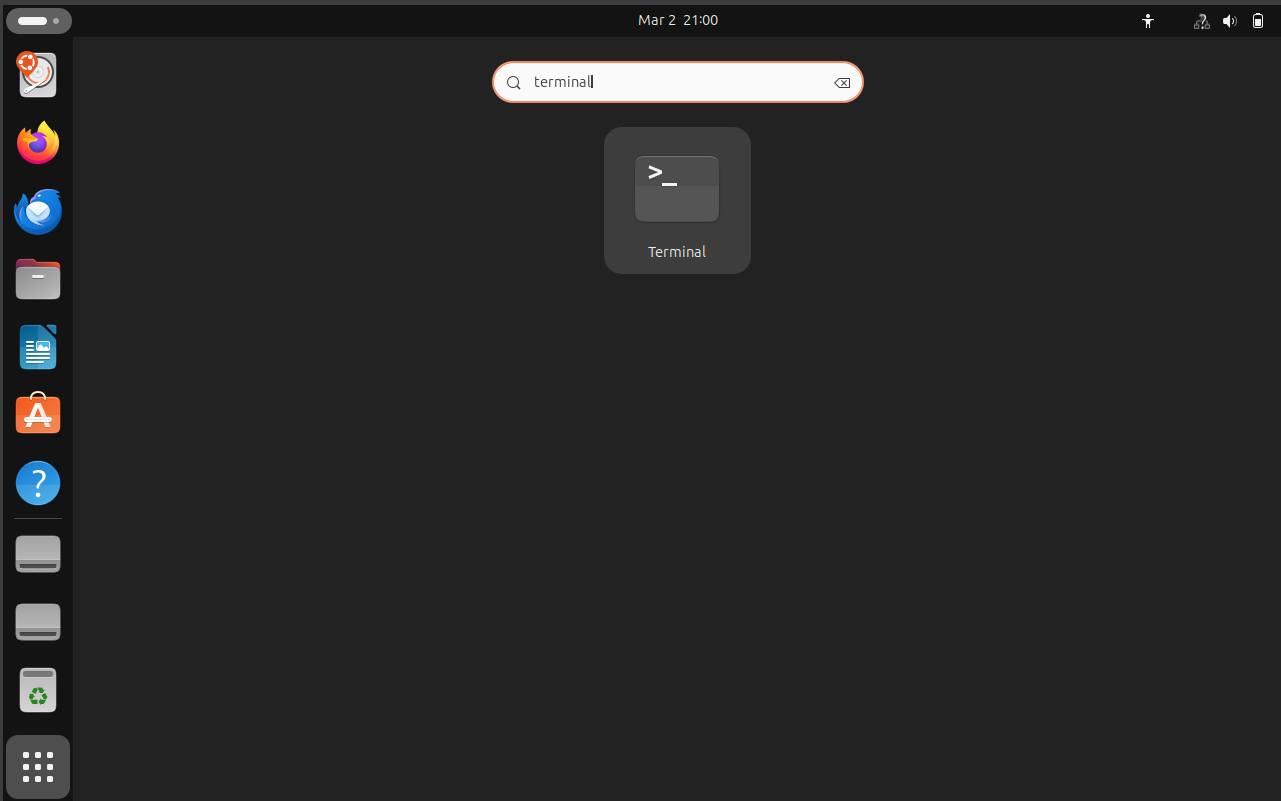
Once your terminal is opened, type the few commands in the image below and 😀 feel proud of yourself. Bravo Champ 👏👏👏👏👏 . Ensure to play with your Ubuntu Vm terminal, and install something on it using the Firefox browser.
Give me a follow on Twitter (@Alpheus___)
You could repeat this same steps for Centos and it will still give you a similar result.
Conclusion
In conclusion, mastering the efficient configuration of operating systems within virtual environments is indispensable for modern development and testing workflows. Through the comprehensive guide provided, readers have gained a thorough understanding of setting up Ubuntu and CentOS on VirtualBox. From the inception of virtualization concepts to the meticulous adjustment of virtual machine settings, each step has been meticulously outlined. By embracing optimization techniques and resource allocation adjustments, users can significantly enhance performance and streamline their OS configurations for seamless development and testing experiences. With these skills at hand, developers and IT professionals are well-equipped to navigate the complexities of virtual environments, empowering them to innovate and iterate with confidence. As technology continues to evolve, the ability to efficiently configure operating systems within virtual environments remains an invaluable asset, enabling organizations to adapt and thrive in an ever-changing landscape.


