Docker Volumes and Data Management: A Comprehensive Guide from Beginners to Advanced


Over View
In a vast and ever-changing world of technology, Docker has come in handy, helping the build and deployment of artifacts with speed and efficiency, removing the hurdles we faced in building products in the past. Now, Engineers can ship products to users seamlessly without necessarily having any challenges with the IT team.
Docker is a platform for developing, shipping, and running applications in containers this is the primary purpose of Docker. These containers are portable which means they can be moved around with ease, and lightweight which means they can run but with little resources and not consume a lot of computer resources, this are self-contained units that contain an application and its dependencies.
The importance of Docker lies in its ability to address challenges that are faced in traditional application deployment. With Docker, developers can package applications in containers along with their dependencies, cutting out all the challenges of this application working in one system and not working in another, ensuring products get to end users with speed. Docker containers use resources efficiently, in isolation and these containers are scalable allowing this application to run effectively in different environments, from development to production.
In a nutshell, Docker has revolutionized the way products are built, shipped, and deployed to the end users, offering a more effective pattern for managing software throughout its lifecycle.
Prerequisite:
This article is for anyone looking to have a better understanding of what Data persistence volumes, binding, etc in Docker are and how they can be implemented, note please this article is not for a beginner in Docker.
Introduction to the concept of data persistence in Docker:
In the context of Docker, data persistence is the ability of a container to retain and manage resources across its lifecycle. We know that Docker containers are naturally built to be transient, whereby the changes that are made to a container are typically lost when the container is stopped or removed, data persistence is a mechanism that is put in place to ensure that critical data persist beyond the lifespan of the container. A Docker container is built to be stateless, meaning it can be easily replaced, and scaled horizontally, which means the container can expand automatically during a high workload and shrink back when the needs are reduced to normal. However, many applications require persistent data, such as user uploads, database configuration, and configuration files. That is why data persistence in the usage of Docker is a very crucial topic.
Now, we are familiar with the fact that data persistence in Docker involves the use of Storage mechanisms that outlive the instance and lifespan of the container.
Docker volume is a fundamental aspect for achieving data persistence and allowing data to be stored outside the container and shared among multiple containers if necessary, this ensures that important information, databases, and application states are not lost when a container shuts down or is replaced, by incorporating data persistence into Docker workflows, developers can build scalable and resilient applications, below are the key points of Docker volumes.
Importance of Docker volumes for managing data across containers:
What are Docker volumes:
Docker volumes is a method in Docker that allows for persistent storage and data sharing between containers. In a containerized environment, the file system inside a container is temporary which means it is short-lived, meaning any changes made to it are lost when the container is stopped or removed. Docker volumes provide a way to persist data beyond the lifecycle of a single container, enabling data to be shared, reused, and maintained across multiple container instances.
Docker volumes play an essential role in managing data effectively across containers, offering advantages contributing to containerized applications' efficiency and reliability.
Sharing Data and Consistency: Docker volumes foster multiple containers to share the same data, enabling collaboration and ensuring consistent access to shared information. This is important for applications with interconnected elements that will be shared in real-time.
Scalability: Docker volumes allow containerized applications to expand automatically during a high workload and shrink back when the needs are reduced to normal. As containers may be easily scaled to meet increased demand, it allows multiple instances of a container to access and share the same data. This promotes efficient utilization and ensures that all the instances operate with the most up-to-date information.
Facilitating Microservices Architecture: Microservice architecture is a process in which applications are composed of distributed coupled, independently deployable services, Docker volumes enable seamless communication and data exchange between microservices. Each microservice can utilize shared volumes to maintain consistent data across the distributed environment.
Backup and Disaster Recovery: Docker volumes simplify the data backup and recovery process. Volume-based data storage makes it easier to perform frequent backups and makes data recovery which is less likely to be lost in the case of a system breakdown or container failure.
In a nutshell, there are several advantages of Docker Volumes, which include persistent storage, Isolation and Independencies, etc. Docker volumes provide a unique approach for managing data across containers, addressing the challenges associated with containerized applications which require persistent and shared storage. This capability enhances the flexibility, reliability, and scalability of Docker-based solutions in various deployment structures.
Understanding the Types Of Docker Volumes for Beginners
Docker supports different types of volumes, which serve different purposes and these are explained below:
Named Volumes: These are volumes that are named and managed by Docker, they provide a convenient way to reference volumes in a human-readable manner, and they are used when you need to reference volumes with clear and identifiable names.
Bind Mounts: This involves mounting a specific directory, from the host machine into the container whereby changes made to the container are reflected on the host machine and vice versa. It is used when one wants to share data or files from the host machine with the container or persist data outside the container’s lifecycle.
Tmpfs Mounts: This type of volume is stored in the host system’s memory, which is used for temporary data that doesn’t need to be persisted. This type of volume is very suitable for data that does not need persistence, e.g., cache or logs that are only relevant during the execution of the container.
Creating and managing basic Docker volumes:
Ok, we will be using a bind mount to create a volume mapping between the host machine and the container. Specifically, the syntax -v [host_path]:[container_path]
- Create a docker file called “Dockerfile” in the directory you want to bind, to the container directory, note, I am using a command prompt so I will have to change the directory to where I want to create my directory. Please ensure Docker Desktop is running.

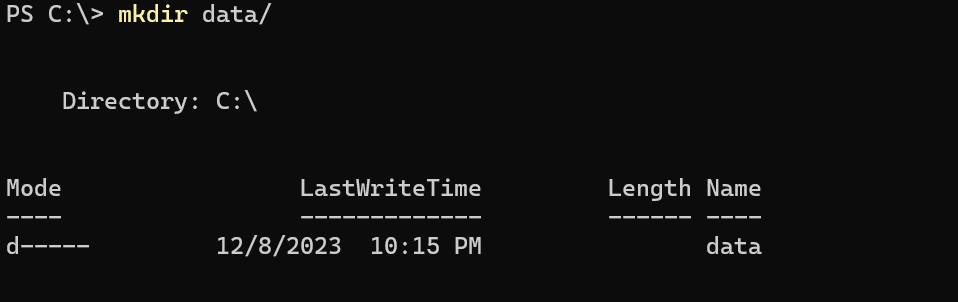
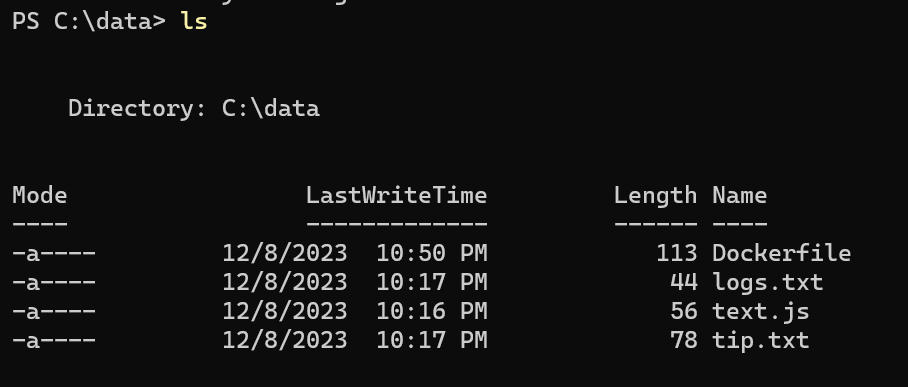
I then created a directory called “C:\data” and then I created some files I wanted to be in the Docker container to ensure data persistence.
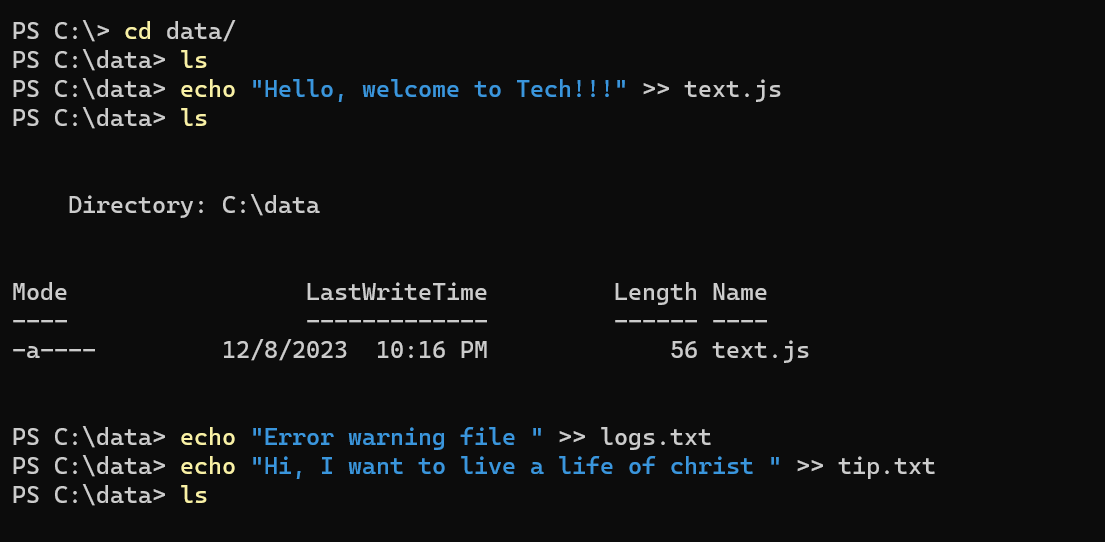
I changed the directory to the “C:\data” I created and also created some files with values in text in them using the echo statement, following the picture below.
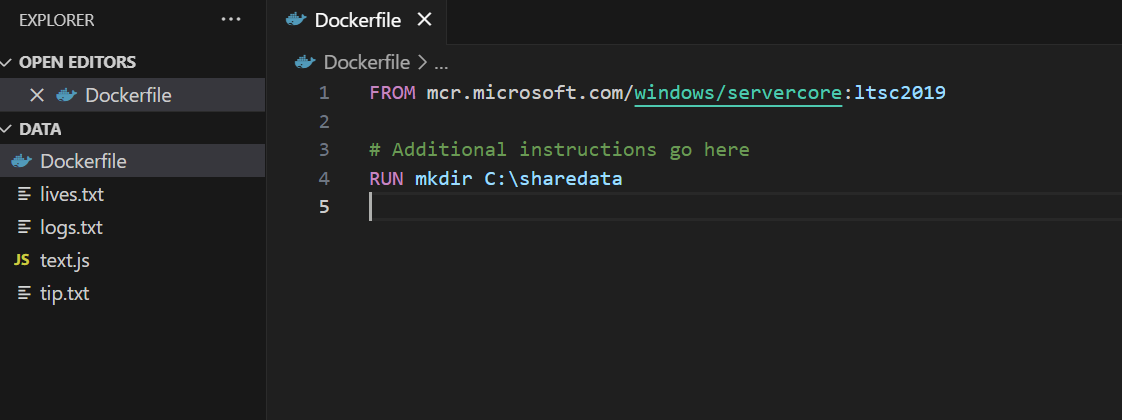
I also opened the directory in the Visual Studio code editor and created a file named “Dockerfile”, and wrote what you are seeing in the picture below.
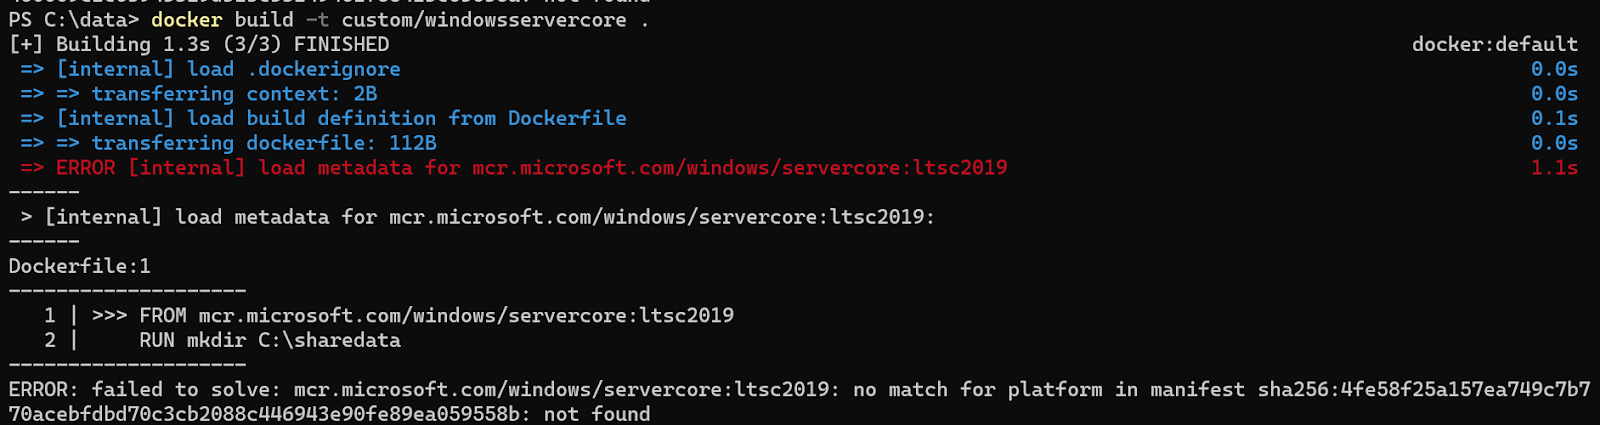
I then ran this command from the command prompt, following the picture below. I got the error in the image below.
Then I tried getting the window container image directly from the Docker hub using the command below, but I still got an error.
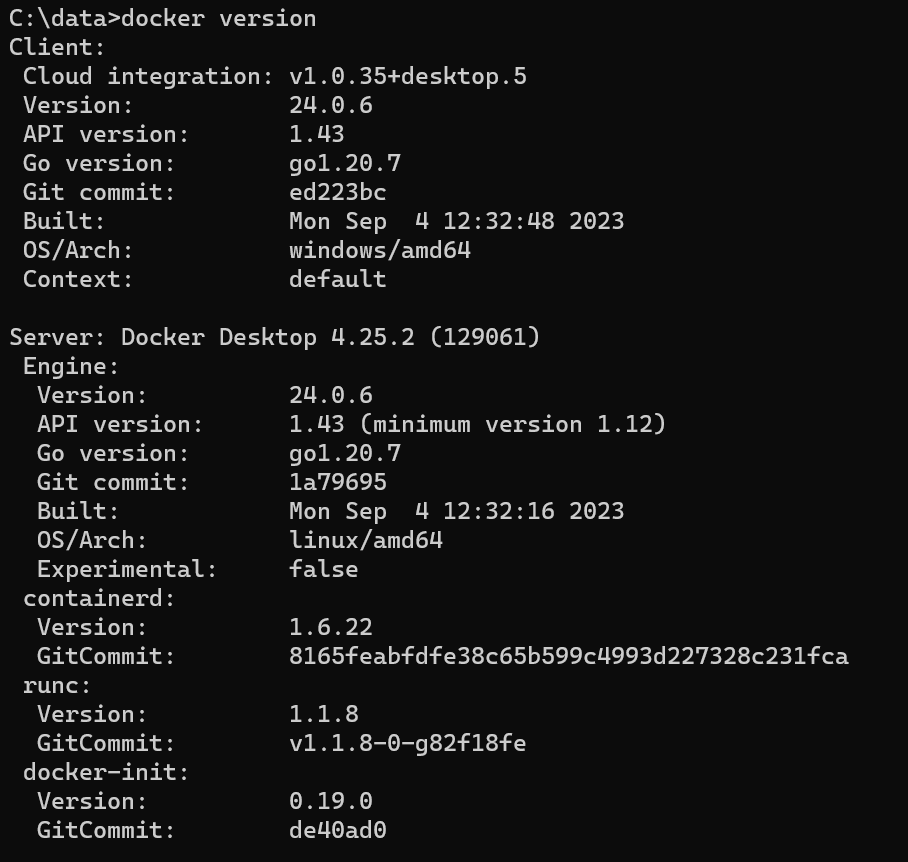
To troubleshoot this, use the command “ docker version”, if your Client section (OS/Arch) is mapped to “windows/amd64” and Server Section is mapped to “Linux/amd64”, you will surely have errors.
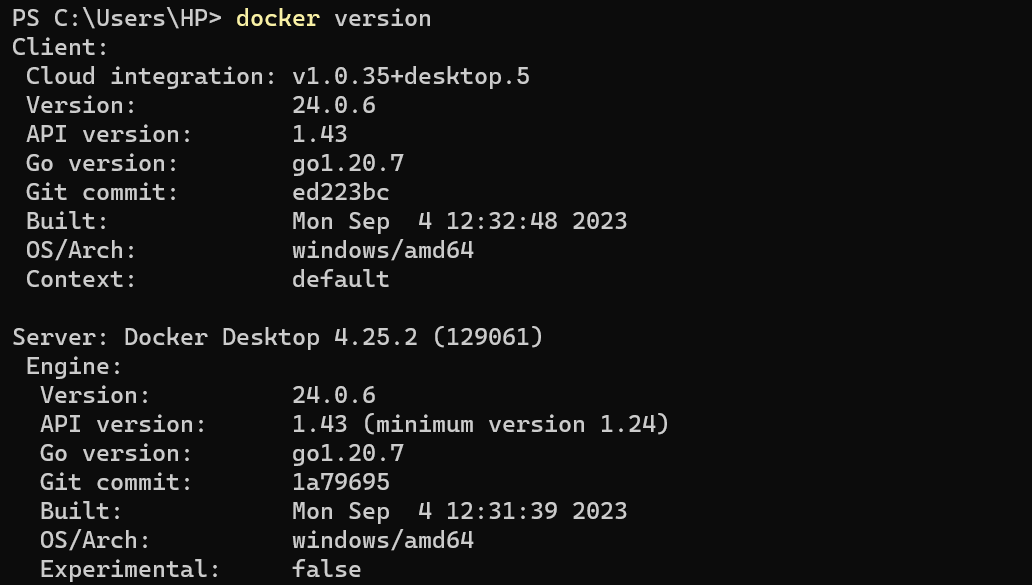
The only to get the window container running if you are using Windows is to change the Linux to windows in the server section, following the picture below.


To check if it has changed use the image below.
If that works well, now we can start the binding of the host directory to the container directory to enhance data persistence and reduce data and files losses, when the container is removed or replaced.
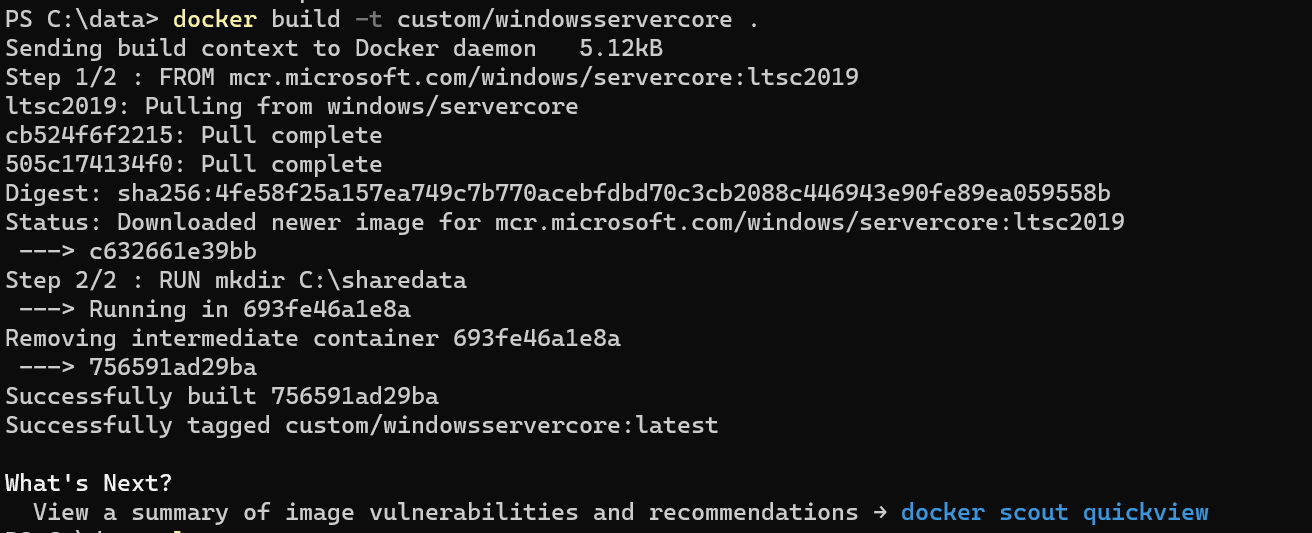
Now, run the custom Dockerfile from your command line again, following the picture below, “docker build -t custom/windowsservercore .”
List the files in the “C:\data” directory, follow the picture below.
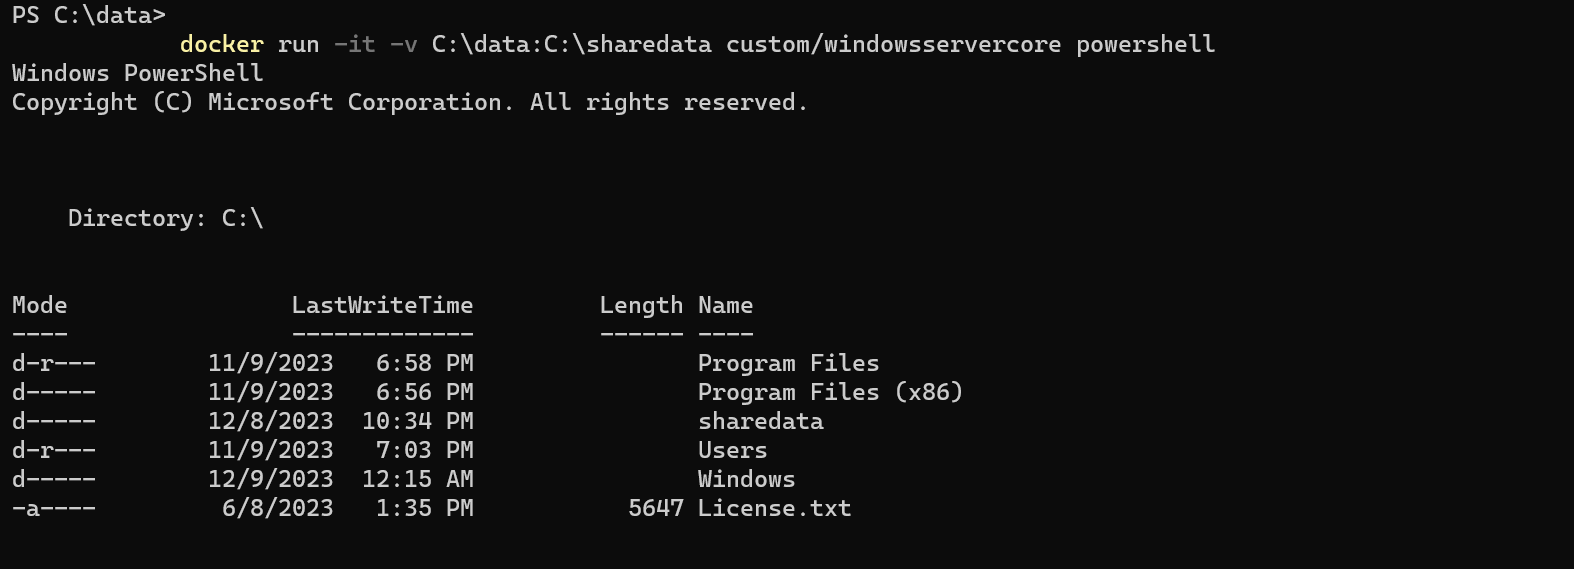
Run this docker command “ docker run -it -v C:\data:C:\sharedata custom/windowsservercore powershell “. The picture below is now a container in docker that has several directories by default because that is how it was built by official publishers of the Microsoft windows image.
Now let me explain what you just wrote:
“docker run -it -v C:\data:C:\sharedata custom/windowsservercore powershell”
“docker run”:
- This command is used to run a new container based on a specified image.
“-it”:
- These flags make the command interactive, allowing you to interact with the container's terminal.
“-v C:\data:C:\sharedata”:
- This flag is used to mount a volume from the host machine to the container. The syntax is -v [host_path]:[container_path].
- C:\data on the host machine is mapped to C:\sharedata inside the container.
- This allows you to share files or data between the host and the container.
custom/windowsservercore:
- This is the name of the Docker image from which the container will be created. It refers to the custom Windows Server Core image you built earlier.
powershell:
- This is the command that will be executed inside the container. In this case, it starts an interactive PowerShell session.
Now, let's run through the sequence of events when you execute this command:
- Docker checks if the specified image (`custom/windowsservercore`) exists locally. If not, it attempts to pull the image from the configured registry (or Docker Hub if no registry is specified).
- A new container is created based on the specified image.
- The -v flag instructs Docker to create a volume mapping between the host machine's C:\data directory and the container's C:\sharedata directory. Any changes made in either location are reflected in both places.
- The -it flags open an interactive terminal session within the container.
- The powershell command is executed, providing you with an interactive PowerShell prompt within the container.
Now, you have a running container based on your custom image, and you can use PowerShell interactively within it. Any changes made to files in C:\sharedata within the container are reflected in the C:\data directory on your host machine and vice versa, thanks to the volume mapping.
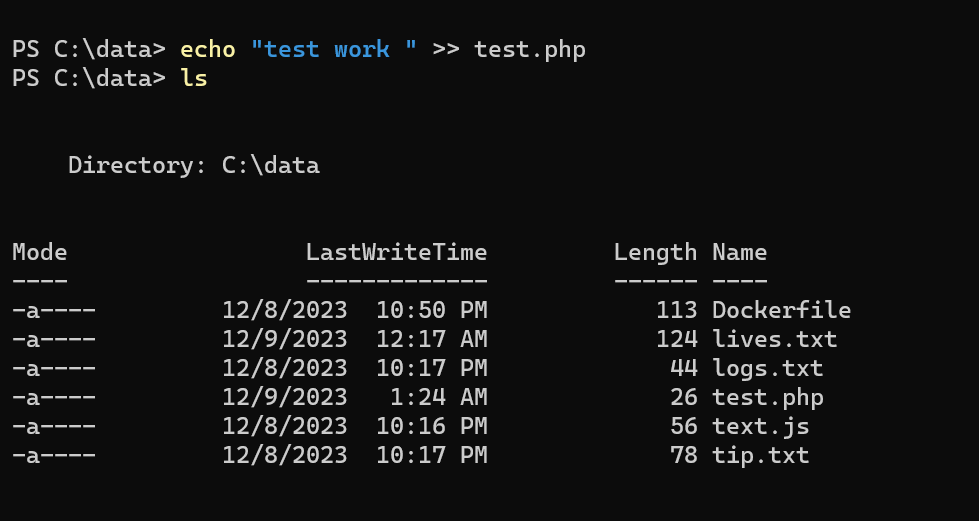
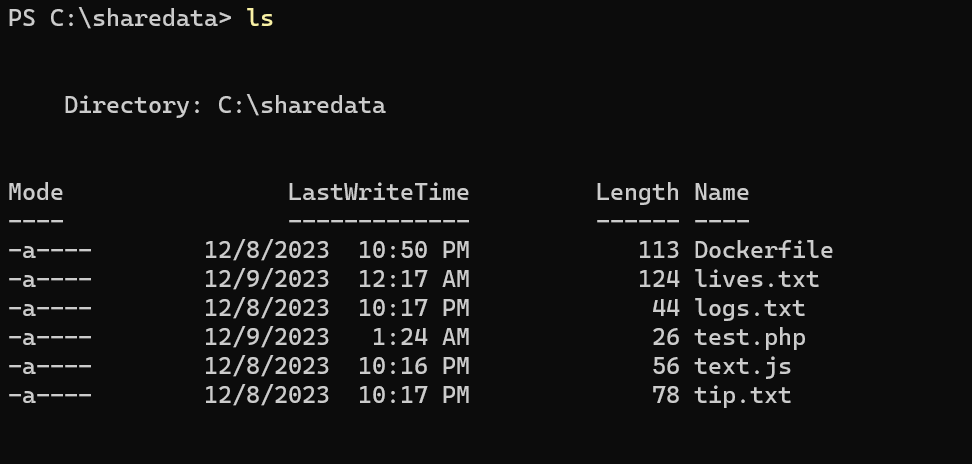
Ok, now you understand what the command above does, Open another terminal( PowerShell) create a file in your container (C:\sharedata), and watch it appear in your “C:\data” directory on your local machine.
Now watch, I created a file called “ test.php” in my “C:\data” and the file was also created in my container “ C:\sharedata”
Now this is what I call data persistence, if anything, whatever happens to your container, you have a backup of that data on your local machine which could be pushed to a repository in the cloud. Nice piece by Alpheus Godswill
Conclusion:
In the world of Docker, volume bind mounting acts as a dynamic bridge between the host machine and containers, making seamless data sharing and persistence. This agile technique enables us as developers to synchronize files effortlessly, whether it's code changes or data manipulation, in real-time across the host environment and the Docker container.